

Have you ever craved a snack that perfectly balances sweet and salty in every bite? Chocolate covered chips are here to satisfy those cravings and become your new favorite treat! Whether you’re looking for a quick dessert, a crowd-pleasing party snack, or a fun project to try with the kids, this recipe is as versatile as it is delicious. Imagine crispy potato chips coated in rich, velvety chocolate, topped with your favorite sprinkles or a sprinkle of sea salt for that extra flair. It’s a homemade snack that’s easy to make yet feels indulgent enough for any occasion. Ready to dive into this unforgettable flavor combo? Let’s get started!
Table of Contents
Key Benefits
If you’re wondering why chocolate covered chips deserve a spot in your snack rotation, let me break it down for you. This delightful treat isn’t just about satisfying your sweet and salty cravings—it’s a versatile, easy-to-make snack that’s perfect for any occasion. Here’s why you’ll love it:
- Quick and Easy: With just a handful of ingredients and minimal prep time, you can whip up a batch of these irresistible treats in no time. Perfect for last-minute cravings or unexpected guests!
- Crowd-Pleaser: Whether it’s a party, movie night, or a gift for a friend, chocolate covered chips are guaranteed to impress. They’re a fun twist on traditional snacks that everyone will rave about.
- Kid-Friendly Fun: Get the little ones involved in the kitchen! Dipping chips in chocolate and adding toppings is a fun activity that doubles as a delicious reward.
- Endless Customization: From dark chocolate to white chocolate, and toppings like nuts, sprinkles, or sea salt, you can tailor this recipe to suit your taste buds or match a theme.
- Perfect for Any Diet: Use gluten-free chips or dairy-free chocolate to accommodate dietary restrictions without sacrificing flavor.
These benefits make chocolate covered chips more than just a snack—they’re a creative, customizable experience that’s as fun to make as it is to eat. Ready to get started? Let’s gather your ingredients and dive into the recipe!
Ingredients
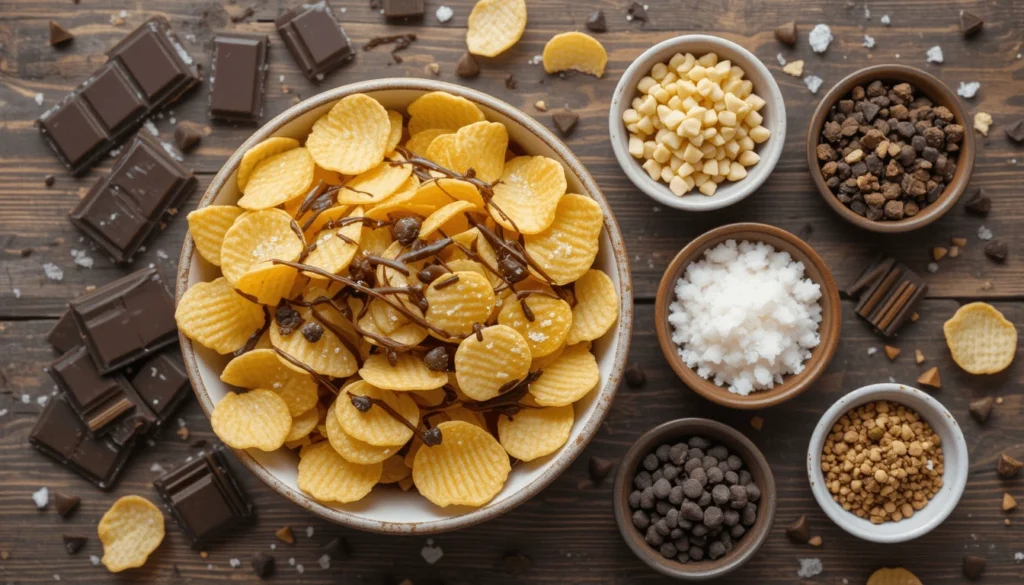
Before we dive into the fun part, let’s make sure you have everything you need to create these irresistible chocolate covered chips. The beauty of this recipe lies in its simplicity—just a few high-quality ingredients can transform ordinary chips into a gourmet treat. Here’s what you’ll need:
- Potato Chips: Opt for thick-cut, sturdy chips that can hold up to the chocolate coating without breaking. Classic salted or ridged chips work best.
- Chocolate: Choose your favorite type—dark, milk, or white chocolate. For the best results, use high-quality baking chocolate or chocolate chips.
- Toppings (Optional): Get creative with toppings like crushed nuts, colorful sprinkles, flaky sea salt, or even a drizzle of caramel.
Pro Tip: If you’re feeling adventurous, try flavored chips (like barbecue or sour cream and onion) for a unique twist!
Why These Ingredients Work:
- The salty crunch of the chips pairs perfectly with the smooth, rich chocolate, creating a balanced flavor profile.
- High-quality chocolate ensures a glossy finish and a melt-in-your-mouth texture.
- Toppings add a fun, personalized touch that makes each bite special.
Gather your ingredients, and let’s move on to the step-by-step process of making these unforgettable chocolate covered chips!
How to Make Chocolate Covered Chips
Ready to turn those simple ingredients into a show-stopping snack? Let’s walk through the process step by step. Don’t worry—it’s easier than you think, and I’ll share plenty of tips along the way to ensure your chocolate covered chips turn out perfectly.
Step 1: Prepare Your Workspace
- Line a baking sheet with parchment paper or a silicone mat. This will prevent the chips from sticking and make cleanup a breeze.
- Set up a cooling rack nearby for drying the chips after dipping.
Step 2: Melt the Chocolate
- Double Boiler Method: Fill a saucepan with an inch of water and bring it to a simmer. Place a heatproof bowl on top (ensure it doesn’t touch the water) and add your chocolate. Stir gently until melted and smooth.
- Microwave Method: Place the chocolate in a microwave-safe bowl and heat in 30-second intervals, stirring between each, until fully melted.
Pro Tip: Add a teaspoon of coconut oil or shortening to the chocolate for a smoother, shinier finish.
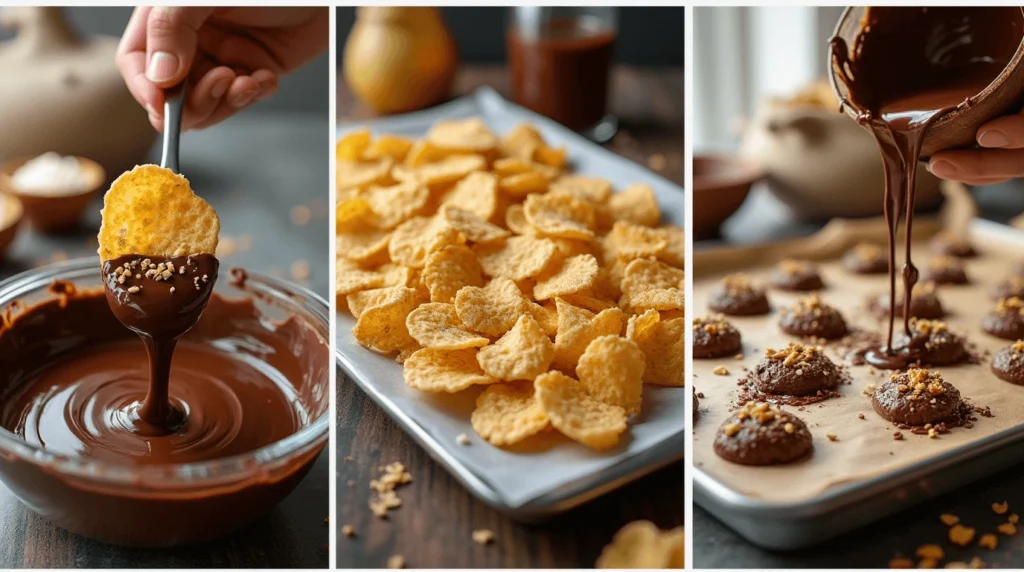
Step 3: Dip the Chips
- Hold a chip by one end and dip it halfway into the melted chocolate, using a spoon to help coat it evenly.
- Let the excess chocolate drip off, then place the chip on the prepared baking sheet.
Step 4: Add Toppings (Optional)
- While the chocolate is still wet, sprinkle on your favorite toppings like crushed nuts, sprinkles, or a pinch of sea salt.
Step 5: Let Them Set
- Allow the chocolate to harden completely. You can speed up the process by placing the baking sheet in the refrigerator for 10-15 minutes.
Pro Tip: For a professional look, drizzle a contrasting chocolate color over the chips once the first layer has set.
And that’s it! You’ve just created a batch of irresistible chocolate covered chips. Now, let’s talk about how to take them to the next level with some pro tips and variations.
Pro Tips and Variations
Now that you’ve mastered the basics, let’s take your chocolate covered chips to the next level with some expert tips and creative variations. Whether you’re looking to troubleshoot common issues or experiment with new flavors, these insights will help you elevate your snack game.
Pro Tips for Perfect Chocolate Covered Chips
- Use High-Quality Chocolate: The better the chocolate, the better the results. Opt for baking chocolate or chocolate chips with a high cocoa content for a rich, smooth finish.
- Keep It Dry: Ensure your chips are completely dry before dipping. Any moisture can cause the chocolate to seize or not adhere properly.
- Work in Small Batches: Melt chocolate in smaller quantities to maintain its smooth consistency. Re-melt as needed to avoid overheating.
- Temperature Matters: If your kitchen is warm, chill the dipped chips in the fridge to help the chocolate set faster and prevent smudging.
- Double Dip for Extra Thickness: For a thicker chocolate coating, let the first layer set, then dip the chips a second time.
Creative Variations to Try
- Flavored Chocolate: Experiment with different types of chocolate, such as dark, milk, or white, or try flavored options like mint or orange-infused chocolate.
- Unique Toppings: Go beyond sprinkles and nuts! Try crushed pretzels, shredded coconut, mini marshmallows, or even a dusting of cocoa powder.
- Seasonal Themes: Match your toppings to the season—think red and green sprinkles for Christmas, pastel colors for Easter, or candy eyes for Halloween.
- Spicy Twist: Add a pinch of chili powder or cayenne to the chocolate for a sweet-and-spicy kick that’s sure to surprise and delight.
- Drizzle Effect: Once the chocolate has set, drizzle a contrasting chocolate color over the chips for a professional, bakery-style finish.
Troubleshooting Common Issues
- Chocolate Too Thick? Add a teaspoon of coconut oil or shortening to thin it out for easier dipping.
- Chocolate Seizing? If your chocolate becomes grainy or clumpy, stir in a bit of warm oil or cream to smooth it out.
- Toppings Not Sticking? Add toppings immediately after dipping while the chocolate is still wet.
With these tips and variations, you can customize your chocolate covered chips to suit any occasion or craving. Ready to serve them up? Let’s move on to some fun and creative serving suggestions!
Serving Suggestions
Now that your chocolate covered chips are ready, it’s time to showcase them in the most delightful way possible! Whether you’re serving them at a party, enjoying them as a treat, or gifting them to someone special, these ideas will help you make the most of your delicious creation.
Ways to Serve Chocolate Covered Chips
- Party Platter: Arrange the chips on a large platter with other sweet and savory snacks like pretzels, popcorn, and fruit for a crowd-pleasing spread.
- Dessert Table: Add them to a dessert table alongside cookies, brownies, and cupcakes for a fun and unexpected treat.
- Ice Cream Topping: Crumble the chips over vanilla ice cream or milkshakes for a crunchy, chocolatey twist.
- Gift Idea: Package them in clear cellophane bags or decorative boxes tied with ribbon for a thoughtful and unique homemade gift.
- Coffee Pairing: Serve them with a cup of coffee or hot cocoa for a cozy, indulgent snack.
Seasonal and Thematic Ideas
- Holiday Treats: Use festive toppings like red and green sprinkles for Christmas or pastel colors for Easter.
- Game Day Snack: Serve them in team-colored bowls or with themed toppings for a fun addition to your game day spread.
- Kid’s Party: Let the kids customize their own chips with a variety of toppings for a fun and interactive activity.
Presentation Tips
- Layering: Create a visually appealing display by layering the chips in a glass jar or bowl.
- Drizzles: Add a final drizzle of melted chocolate or caramel over the arranged chips for an elegant touch.
- Labels: If you’re serving multiple variations, use small labels to indicate the different flavors or toppings.
Storage Tips
- Store your chocolate covered chips in an airtight container at room temperature for up to 3 days.
- For longer storage, keep them in the fridge for up to a week, but let them come to room temperature before serving for the best texture.
With these serving suggestions, your chocolate covered chips are sure to be a hit no matter the occasion. Ready to wrap things up? Let’s head to the conclusion for some final thoughts and encouragement!
Conclusion
Congratulations—you’ve just created a batch of unforgettable chocolate covered chips! Whether you’re enjoying them as a sweet-and-salty snack, sharing them at a party, or gifting them to someone special, these treats are sure to leave a lasting impression.
This recipe is more than just a snack; it’s a chance to get creative in the kitchen and have fun with flavors. From choosing your favorite chocolate to experimenting with unique toppings, the possibilities are endless. Plus, it’s a fantastic way to involve friends and family in the process, making it a memorable activity for everyone.
I hope this guide has inspired you to try new variations and make this recipe your own. Don’t forget to share your creations with me—I’d love to hear about your favorite combinations and how you served them!
If you enjoyed this recipe, be sure to explore more of my easy and delicious snack ideas. Happy cooking, and may your kitchen always be filled with joy (and chocolate)!
___________________________________________________
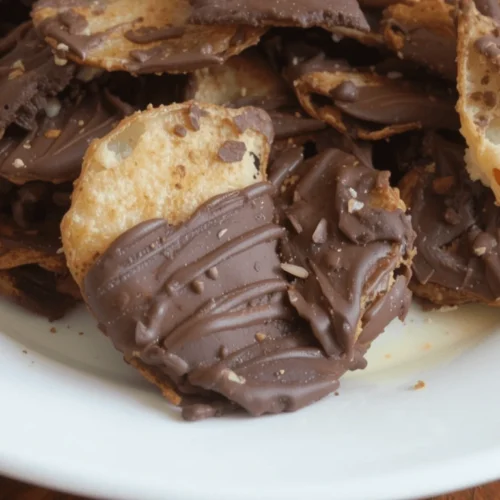
chocolate covered chips
Ingredients
Potato Chips: Opt for thick-cut, sturdy chips that can hold up to the chocolate coating without breaking. Classic salted or ridged chips work best.
Chocolate: Choose your favorite type—dark, milk, or white chocolate. For the best results, use high-quality baking chocolate or chocolate chips.
Toppings (Optional): Get creative with toppings like crushed nuts, colorful sprinkles, flaky sea salt, or even a drizzle of caramel.
Pro Tip: If you’re feeling adventurous, try flavored chips (like barbecue or sour cream and onion) for a unique twist!
Instructions
Step 1: Prepare Your Workspace
- Line a baking sheet with parchment paper or a silicone mat. This will prevent the chips from sticking and make cleanup a breeze.
- Set up a cooling rack nearby for drying the chips after dipping.
Step 2: Melt the Chocolate
- Double Boiler Method: Fill a saucepan with an inch of water and bring it to a simmer. Place a heatproof bowl on top (ensure it doesn’t touch the water) and add your chocolate. Stir gently until melted and smooth.
- Microwave Method: Place the chocolate in a microwave-safe bowl and heat in 30-second intervals, stirring between each, until fully melted.
- Pro Tip: Add a teaspoon of coconut oil or shortening to the chocolate for a smoother, shinier finish.
Step 3: Dip the Chips
- Hold a chip by one end and dip it halfway into the melted chocolate, using a spoon to help coat it evenly.
- Let the excess chocolate drip off, then place the chip on the prepared baking sheet.
Step 4: Add Toppings (Optional)
- While the chocolate is still wet, sprinkle on your favorite toppings like crushed nuts, sprinkles, or a pinch of sea salt.
Step 5: Let Them Set
- Allow the chocolate to harden completely. You can speed up the process by placing the baking sheet in the refrigerator for 10-15 minutes.
Notes
- Calories: 150 kcal
- Fat: 9g
- Saturated Fat: 5g
- Carbohydrates: 15g
- Sugar: 8g
- Protein: 2g
- Sodium: 80mg
- Fiber: 1g
FAQs
Got questions about making chocolate covered chips? Don’t worry—I’ve got you covered! Here are answers to some of the most common questions to help you troubleshoot, customize, and perfect this recipe.
1. Can I use any type of potato chips?
Absolutely! Thick-cut or ridged chips work best because they’re sturdy enough to hold the chocolate coating. Feel free to experiment with flavored chips like barbecue or sour cream and onion for a unique twist.
2. What’s the best chocolate to use?
High-quality baking chocolate or chocolate chips are ideal for a smooth, glossy finish. You can use dark, milk, or white chocolate—it all depends on your preference. For a dairy-free option, try vegan chocolate chips.
3. How do I prevent the chocolate from seizing?
-Make sure your tools and bowls are completely dry, as even a drop of water can cause chocolate to seize.
-Melt the chocolate slowly over low heat or in short microwave intervals, stirring frequently.
-If the chocolate does seize, add a teaspoon of coconut oil or warm cream and stir until smooth.
4. Can I make these ahead of time?
Yes! Store your chocolate covered chips in an airtight container at room temperature for up to 3 days or in the fridge for up to a week. Let them come to room temperature before serving for the best texture.
5. How do I get the toppings to stick?
Add your toppings immediately after dipping the chips, while the chocolate is still wet. If the chocolate sets too quickly, gently press the toppings into the surface.
6. Can I use this recipe for other snacks?
Definitely! This method works great for pretzels, crackers, popcorn, or even fruit like strawberries and bananas. Get creative and have fun with it!
7. What if my chocolate coating is too thick or thin?
–Too Thick? Add a teaspoon of coconut oil or shortening to thin it out for easier dipping.
–Too Thin? Let the chocolate cool slightly or add more melted chocolate to thicken it.
8. Are there any dietary substitutions?
-For gluten-free options, use gluten-free potato chips.
-For dairy-free or vegan versions, use dairy-free chocolate and check that your toppings are plant-based.
If you have more questions or need further tips, don’t hesitate to reach out. Happy snacking, and enjoy your delicious chocolate covered chips!