

There’s something undeniably magical about a heart cake it’s not just a dessert; it’s a symbol of love, celebration, and creativity. Whether you’re planning a romantic Valentine’s Day, a heartfelt anniversary, or simply want to surprise someone special, this showstopper dessert is guaranteed to steal the spotlight. Imagine slicing into a beautifully decorated heart-shaped cake, its layers moist and flavorful, its design a testament to your thoughtfulness.
But here’s the best part: you don’t need to be a professional baker to create this masterpiece. With a few simple ingredients, some creative cake ideas, and a sprinkle of passion, you can whip up a heart cake that looks as stunning as it tastes. Ready to impress your loved ones and make every occasion unforgettable? Let’s dive into the art of baking and decorating a heart cake that’s as unique as your love story.
Table of Contents
Key Benefits
There’s no denying it—heart cakes are more than just desserts; they’re edible expressions of love and creativity. Whether you’re celebrating a milestone or simply want to brighten someone’s day, a heart-shaped cake is the perfect way to make any occasion unforgettable. Here’s why this showstopper dessert deserves a spot in your baking repertoire:
- Emotional Impact: A heart cake speaks volumes without saying a word. It’s the ultimate way to show someone you care, making it ideal for romantic occasions like Valentine’s Day, anniversaries, or even a surprise “just because” moment.
- Versatility: From birthdays to weddings, this celebration cake fits seamlessly into any event. Plus, it’s a blank canvas for your creativity—think vibrant colors, intricate designs, or even personalized messages.
- Eye-Catching Appeal: Let’s face it—heart cake designs are instant crowd-pleasers. Their unique shape and decorative potential make them the star of any dessert table.
- Memorable Experience: Baking and sharing a heart cake isn’t just about the taste; it’s about creating lasting memories. The joy of slicing into a beautifully crafted cake is unmatched.
Whether you’re a seasoned baker or a beginner, this heart cake recipe is designed to inspire and delight. It’s not just about the final product—it’s about the journey of creating something truly special. Ready to get started? Let’s gather your ingredients and dive into the fun part: baking and decorating!
Ingredients
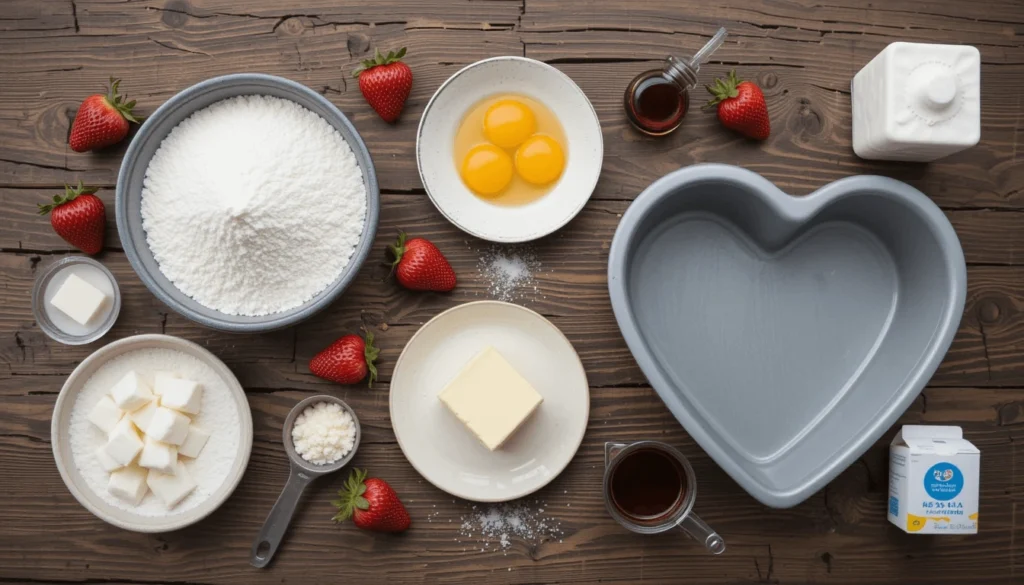
Before we dive into the fun part of baking and decorating, let’s make sure you have everything you need to create your heart cake masterpiece. The beauty of this recipe lies in its simplicity—most of these ingredients are likely already in your pantry. Here’s what you’ll need:
For the Cake:
- 2 ½ cups (315g) all-purpose flour
- 2 cups (400g) granulated sugar
- 1 cup (225g) unsalted butter, softened
- 4 large eggs, at room temperature
- 1 cup (240ml) whole milk
- 1 tsp vanilla extract
- 2 tsp baking powder
- ½ tsp baking soda
- ¼ tsp salt
For the Frosting:
- 3 cups (375g) powdered sugar
- 1 cup (225g) unsalted butter, softened
- 2-3 tbsp heavy cream or milk
- 1 tsp vanilla extract
- A few drops of red or pink food coloring (optional, for a romantic touch)
For Decoration (Optional):
- Sprinkles, edible glitter, or fondant for added flair
- Fresh berries or edible flowers for a natural touch
Equipment:
- Heart-shaped cake pan (or a round pan you can carve into a heart shape)
- Mixing bowls, whisk, and spatula
- Piping bags and tips for frosting (optional but fun!)
Pro Tips for Ingredient Prep:
- Room Temperature Ingredients: Ensure your butter, eggs, and milk are at room temperature. This helps create a smoother batter and a more even bake.
- Quality Matters: Use high-quality vanilla extract and butter for the best flavor. Trust me, it makes a difference!
- Customize Your Colors: If you’re making this for a specific occasion, match the food coloring to the theme—think pink for Valentine’s Day or pastels for a spring celebration.
With your ingredients ready, you’re all set to create a heart cake that’s as delightful to make as it is to eat. Let’s move on to the next step: baking your cake to perfection!
How to Make Heart Cake
Now that your ingredients are prepped and ready, it’s time to bring your heart cake to life! Don’t worry—this step-by-step guide will walk you through the process, making it easy and enjoyable. Let’s create a showstopper dessert that’s as fun to make as it is to eat.
Step 1: Prepare the Cake Batter
- Preheat your oven to 350°F (175°C) and grease your heart-shaped cake pan with butter or non-stick spray. For extra insurance, line it with parchment paper.
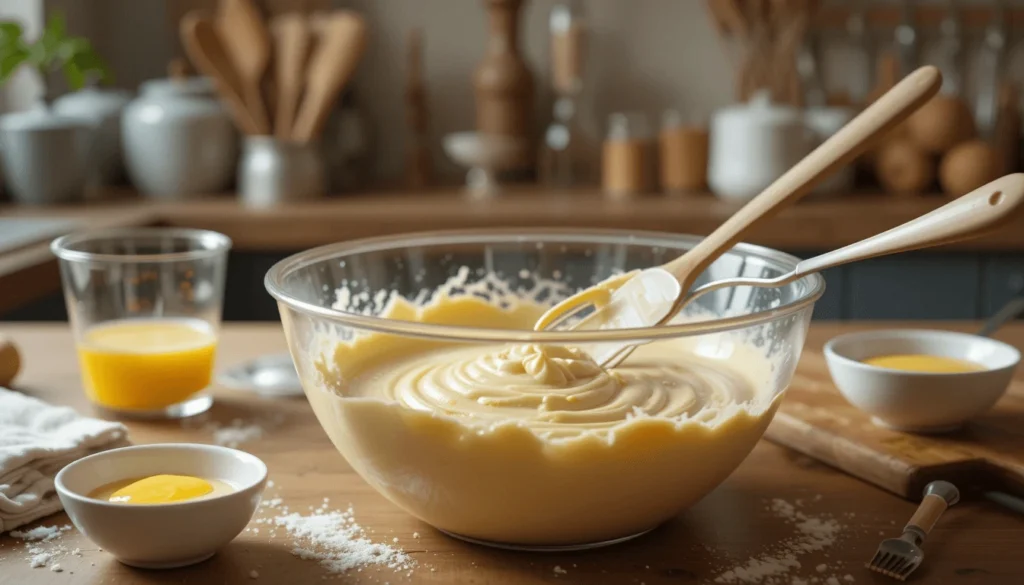
- In a large mixing bowl, cream together the softened butter and granulated sugar until light and fluffy. This should take about 3-4 minutes with an electric mixer.
- Add the eggs one at a time, mixing well after each addition. Stir in the vanilla extract.
- In a separate bowl, whisk together the flour, baking powder, baking soda, and salt.
- Gradually add the dry ingredients to the butter mixture, alternating with the milk. Mix until just combined—overmixing can lead to a dense cake.
Step 2: Bake the Cake
- Pour the batter into your prepared heart-shaped pan, spreading it evenly with a spatula.
- Bake for 25-30 minutes, or until a toothpick inserted into the center comes out clean.
- Let the cake cool in the pan for 10 minutes, then transfer it to a wire rack to cool completely. Pro tip: If you don’t have a heart-shaped pan, bake a round cake and carefully carve it into a heart shape once cooled.
Step 3: Make the Frosting
- While the cake cools, prepare the frosting. In a mixing bowl, beat the softened butter until creamy.
- Gradually add the powdered sugar, mixing on low speed to avoid a sugar cloud!
- Add the vanilla extract and heavy cream, one tablespoon at a time, until the frosting reaches your desired consistency. For a pop of color, mix in a few drops of red or pink food coloring.
Step 4: Decorate Your Heart Cake
- Once the cake is completely cool, spread a thin layer of frosting over the top and sides to create a “crumb coat.” This seals in any loose crumbs and gives you a smooth base for decorating.
- Use a piping bag fitted with your favorite tip to add swirls, rosettes, or other designs. If you’re feeling creative, try ombre frosting or add sprinkles and edible glitter for extra sparkle.
- For a fresh, elegant touch, garnish with fresh berries or edible flowers.
Pro Tips for Success:
- Level Your Cake: If your cake has a domed top, use a serrated knife to level it before frosting. This ensures a stable, even surface.
- Chill Before Frosting: Pop the cake in the fridge for 15-20 minutes after the crumb coat. This makes the final decorating process much easier.
- Get Creative: Don’t be afraid to experiment with flavors and designs. Add a layer of strawberry jam between cake layers or mix cocoa powder into the frosting for a chocolate twist.
And there you have it a stunning heart cake that’s sure to steal the spotlight at any gathering. Now, let’s move on to some pro tips and variations to take your cake to the next level!
Pro Tips and Variations
Now that you’ve mastered the basics of making a heart cake, let’s take it up a notch with some pro tips and creative variations. Whether you’re looking to troubleshoot common issues or add a unique twist to your cake, these insights will help you bake with confidence and flair.
Pro Tips for Perfect Heart Cakes
- Avoid Overmixing: Overmixing the batter can lead to a dense, tough cake. Mix until the ingredients are just combined for a light, fluffy texture.
- Even Baking: To ensure your cake bakes evenly, rotate the pan halfway through the baking time. If the edges are browning too quickly, cover them with foil.
- Cool Completely: Always let your cake cool completely before frosting. A warm cake can melt the frosting and make it harder to decorate.
- Crumb Coat Magic: Don’t skip the crumb coat! This thin layer of frosting locks in crumbs and gives your final decoration a polished look.
- Chill for Clean Slices: For neat, clean slices, chill the cake in the fridge for 20-30 minutes before cutting.
Creative Variations to Try
- Flavor Twists:
- Chocolate Lovers: Swap ½ cup of flour for cocoa powder to create a rich chocolate heart cake.
- Fruity Delight: Add a layer of strawberry jam or fresh berries between the cake layers for a burst of fruity flavor.
- Citrus Zest: Mix in the zest of a lemon or orange for a refreshing, tangy twist.
- Dietary Adaptations:
- Gluten-Free: Use a 1:1 gluten-free flour blend to make this cake gluten-free without sacrificing texture.
- Vegan: Replace eggs with flax eggs (1 tbsp ground flaxseed + 3 tbsp water per egg) and use plant-based milk and butter.
- Decorative Ideas:
- Ombre Frosting: Use different shades of pink or red frosting to create a stunning ombre effect.
- Edible Flowers: Top your cake with edible flowers for a natural, elegant look.
- Personalized Messages: Use a piping bag to write names, dates, or sweet messages on the cake.
Troubleshooting Common Issues
- Cake Sticking to the Pan: Ensure your pan is well-greased and lined with parchment paper. Let the cake cool for 10 minutes before removing it from the pan.
- Dry Cake: Overbaking can dry out your cake. Check for doneness a few minutes before the recommended baking time.
- Lumpy Frosting: Sift your powdered sugar before mixing it into the butter to avoid lumps. If the frosting is too thick, add a splash of milk or cream.
With these pro tips and variations, you’re ready to create a heart cake that’s uniquely yours. Whether you stick to the classic recipe or experiment with new flavors and designs, the possibilities are endless. Next up, let’s talk about how to serve your masterpiece in style!
Serving Suggestions
Your heart cake is baked, frosted, and beautifully decorated—now it’s time to serve it in a way that wows your guests! Presentation is key when it comes to celebration cakes, and with a few simple tips, you can turn your dessert into a true centerpiece. Here’s how to make your heart cake the star of the show:
1. Plating Perfection
- Choose the Right Plate: Use a cake stand or a large, elegant plate that complements your cake’s design. A white or pastel-colored plate works well to highlight the vibrant colors of your cake.
- Add a Backdrop: Place your cake on a decorative tablecloth or runner to create a cohesive look. Think seasonal themes—like red and pink for Valentine’s Day or pastels for spring.
2. Garnishing Ideas
- Fresh Berries: Scatter strawberries, raspberries, or blueberries around the base of the cake for a fresh, colorful touch.
- Edible Flowers: Add a few edible flowers like pansies or rose petals for an elegant, Instagram-worthy finish.
- Sprinkles and Glitter: Sprinkle edible glitter or heart-shaped sprinkles around the plate for a playful, festive vibe.
3. Pairing Suggestions
- Beverages: Serve your heart cake with a cup of hot coffee, tea, or a glass of sparkling wine for a sophisticated pairing.
- Ice Cream: A scoop of vanilla or strawberry ice cream alongside your cake creates a delightful contrast of temperatures and textures.
- Whipped Cream: Offer a dollop of freshly whipped cream on the side for an extra indulgent treat.
4. Portioning Tips
- Clean Slices: Use a sharp, warm knife to cut clean slices. Dip the knife in hot water and wipe it dry between cuts for a polished look.
- Portion Size: A standard heart cake serves 8-10 people, depending on the size of your slices. For larger gatherings, consider making a double-layer cake or multiple smaller cakes.
5. Storing Leftovers
- Room Temperature: If you plan to enjoy the cake within 1-2 days, store it in an airtight container at room temperature.
- Refrigeration: For longer storage, keep the cake in the fridge for up to 5 days. Let it come to room temperature before serving for the best texture.
- Freezing: Wrap individual slices in plastic wrap and freeze for up to 2 months. Thaw in the fridge overnight before serving.
Pro Tip: Make It Interactive
Set up a DIY cake decorating station with extra frosting, sprinkles, and toppings. Let your guests personalize their slices for a fun, interactive dessert experience!
With these serving suggestions, your heart cake will not only taste amazing but also look like a work of art. Now that you’ve mastered the art of baking, decorating, and serving, let’s wrap things up with some final thoughts and FAQs to answer all your burning questions!
Conclusion
Congratulations—you’ve just created a heart cake that’s as beautiful as it is delicious! Whether you baked this showstopper dessert for a special occasion or simply to spread a little love, you’ve mastered the art of turning simple ingredients into something extraordinary.
Baking a heart cake isn’t just about the final product; it’s about the joy of creating something with your own hands, the smiles it brings to your loved ones, and the memories you make along the way. From mixing the batter to adding the final decorative touches, every step is an opportunity to express your creativity and love.
Remember, baking is as much about the journey as it is about the destination. Don’t be afraid to experiment with flavors, designs, and techniques. Whether you stick to the classic recipe or try one of the creative variations we discussed, the most important ingredient is always the love you pour into it.
So, the next time you’re planning a celebration or just want to brighten someone’s day, reach for this heart cake recipe. It’s more than just a dessert—it’s a heartfelt gesture that speaks volumes.
Thank you for joining me on this baking adventure! If you have any questions or want to share your heart cake creations, feel free to reach out. And don’t forget to check out the FAQs below for answers to common baking queries. Happy baking!
FAQs
Even the most confident bakers have questions, and that’s perfectly okay! Here are answers to some of the most common questions about making a heart cake, along with tips to help you troubleshoot and succeed.
1. Can I make a heart cake without a heart-shaped pan?
Absolutely! If you don’t have a heart-shaped pan, you can bake a round cake and a square cake. Once cooled, cut the round cake in half and place the straight edges against two adjacent sides of the square cake to form a heart shape. Trim any excess for a perfect fit.
2. How do I prevent my cake from sticking to the pan?
To ensure your cake releases easily:
– Grease the pan thoroughly with butter or non-stick spray.
– Line the bottom with parchment paper for extra insurance.
– Let the cake cool in the pan for 10 minutes before transferring it to a wire rack.
3. Can I make this cake ahead of time?
Yes! You can bake the cake layers a day in advance. Wrap them tightly in plastic wrap and store them at room temperature. Frost and decorate the cake on the day you plan to serve it for the freshest taste and texture.
4. How do I fix lumpy frosting?
If your frosting turns out lumpy:
– Sift the powdered sugar before adding it to the butter.
– Beat the frosting on medium speed for 3-5 minutes until smooth.
– If lumps persist, gently warm the frosting in the microwave for 5-10 seconds and mix again.
5. Can I freeze a heart cake?
Definitely! Wrap the unfrosted cake layers tightly in plastic wrap and aluminum foil, then freeze for up to 2 months. Thaw in the fridge overnight before frosting and decorating. You can also freeze frosted cake slices for a quick treat later.
6. What’s the best way to store a heart cake?
– Room Temperature: Store in an airtight container for 1-2 days.
– Refrigerator: Keep in the fridge for up to 5 days. Let it come to room temperature before serving.
– Freezer: Wrap individual slices and freeze for up to 2 months.
7. How can I make my cake more moist?
For an extra-moist cake:
– Don’t overbake it—check for doneness a few minutes before the recommended time.
– Add a tablespoon of sour cream or Greek yogurt to the batter.
– Brush the cooled cake layers with simple syrup (equal parts sugar and water, heated until dissolved) before frosting.
8. Can I make this cake gluten-free or vegan?
Yes! For a gluten-free version, use a 1:1 gluten-free flour blend. For a vegan cake, replace eggs with flax eggs (1 tbsp ground flaxseed + 3 tbsp water per egg) and use plant-based milk and butter.
9. How do I achieve smooth frosting?
For a professional-looking finish:
– Apply a thin crumb coat first and chill the cake for 15-20 minutes.
– Use an offset spatula or bench scraper to spread the final layer of frosting evenly.
– Dip your spatula in hot water, wipe it dry, and smooth the frosting for a polished look.
10. What’s the best way to transport a heart cake?
To transport your cake safely:
– Place it on a non-slip mat or a dab of frosting on the cake board to keep it steady
– Use a cake carrier or a box slightly larger than the cake.
– Chill the cake in the fridge for 20-30 minutes before traveling to firm up the frosting.
With these FAQs, you’re equipped to tackle any challenge that comes your way while baking a heart cake. Remember, every baker learns through practice, so don’t be afraid to experiment and have fun. Happy baking!