
Have you ever wanted to bake cookies that are as delightful to look at as they are to eat? Imagine pulling a tray of vibrant, eye-catching cookies out of the oven—each one bursting with color and flavor, perfect for brightening up any occasion. Whether you’re baking for a festive celebration, a kid-friendly treat, or just to satisfy your sweet tooth, using colorful ingredients like natural food dyes and creative add-ins can transform your cookies into irresistible masterpieces.
From the earthy tones of beetroot powder to the sunny hues of turmeric, these natural ingredients not only make your cookies visually stunning but also add a unique twist to their flavor. And the best part? You don’t need to be a professional baker to create these festive treats—this recipe is designed to be simple, fun, and adaptable to your preferences.
So, are you ready to dive into the world of creative baking and whip up a batch of cookies that will leave everyone asking for more? Let’s get started!
Key Benefits
When it comes to baking, colorful ingredients aren’t just about making your cookies look pretty—they’re a gateway to creativity, flavor, and fun! Here’s why incorporating vibrant elements into your cookie recipes is a game-changer:
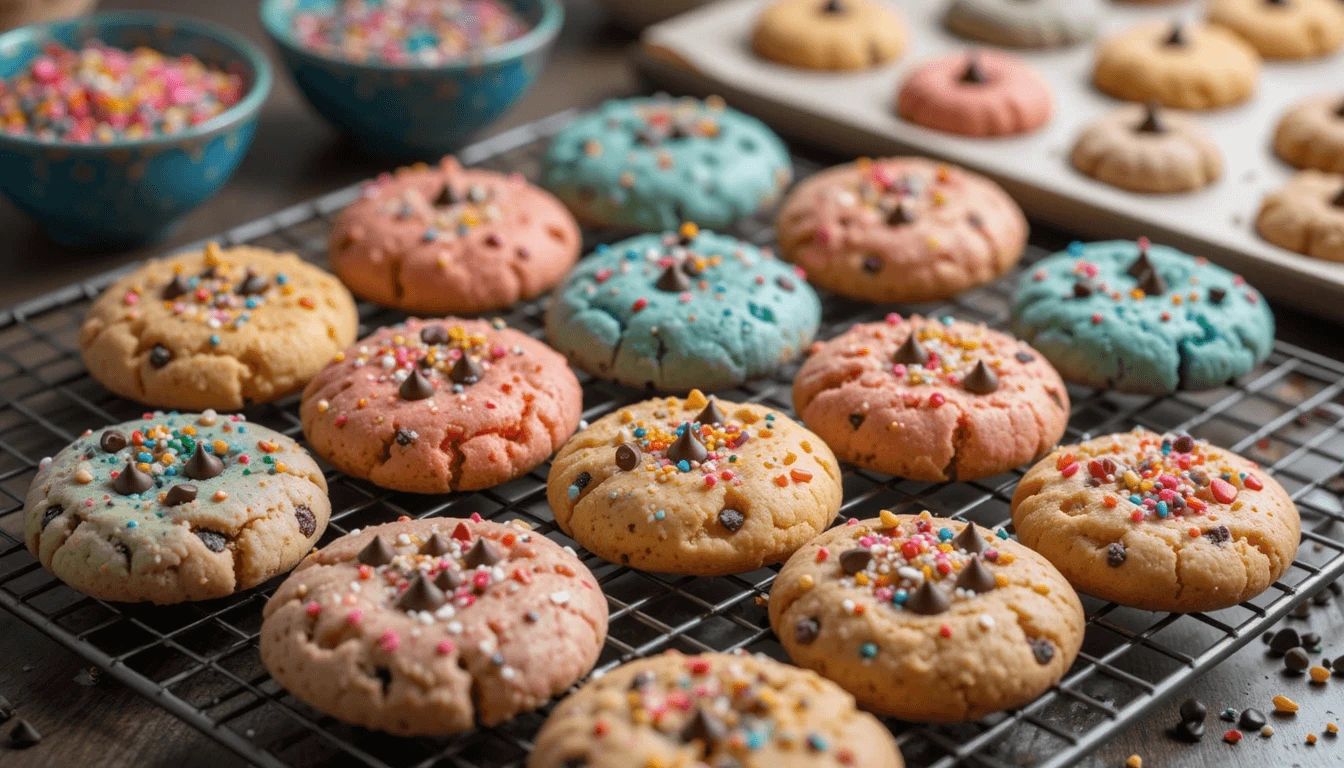
- Eye-Catching Appeal: Bright, colorful cookies are instant showstoppers, perfect for parties, holidays, or even just brightening up a regular day. Imagine serving a platter of rainbow cookies that instantly put a smile on everyone’s face!
- Natural and Nutritious: By using natural food dyes like beetroot powder, matcha, or spirulina, you’re not only avoiding artificial additives but also adding a boost of nutrients to your treats.
- Kid-Friendly Fun: Baking with colorful ingredients is a fantastic way to get kids involved in the kitchen. They’ll love helping mix, shape, and decorate these festive treats, making it a memorable family activity.
- Endless Creativity: From pastel hues to bold, vibrant shades, the possibilities are endless. You can tailor your cookies to match any theme, season, or mood, making them perfect for birthdays, holidays, or even just because.
- Flavorful Twists: Many natural ingredients used for color, like freeze-dried fruits or cocoa powder, also add unique flavors to your cookies, taking them from ordinary to extraordinary.
Whether you’re a seasoned baker or just starting out, experimenting with colorful ingredients is a simple way to elevate your cookies and make them truly unforgettable. Ready to dive in? Let’s explore the ingredients and techniques that will bring your vibrant cookie dreams to life!
Ingredients
Creating irresistibly delicious and colorful cookies starts with gathering the right ingredients. Here’s everything you’ll need to bring your vibrant cookie recipe to life. Don’t worry—most of these are pantry staples or easy-to-find natural ingredients that pack both color and flavor!
Dry Ingredients
- 2 ½ cups all-purpose flour: The base of your cookie dough. For a gluten-free option, swap with almond flour or a gluten-free blend.
- 1 tsp baking powder: Helps your cookies rise slightly for that perfect texture.
- ½ tsp salt: Balances the sweetness and enhances the flavors.
Wet Ingredients
- 1 cup unsalted butter (softened): Adds richness and helps create a tender crumb. Use vegan butter for a dairy-free version.
- 1 cup granulated sugar: For that classic sweetness. You can also use coconut sugar for a healthier twist.
- 1 large egg: Binds the dough together. Substitute with a flax egg (1 tbsp ground flaxseed + 3 tbsp water) for a vegan option.
- 1 tsp vanilla extract: Adds a warm, aromatic flavor.
Colorful Ingredients
- 1-2 tbsp beetroot powder: For a vibrant pink or red hue.
- 1-2 tbsp matcha powder: Adds a beautiful green color and a subtle earthy flavor.
- 1-2 tbsp turmeric powder: Perfect for sunny yellow cookies.
- 1-2 tbsp cocoa powder: For rich, chocolatey brown tones.
- Freeze-dried fruit powders (e.g., raspberry, blueberry): Natural, fruity, and packed with color.
- Edible glitter or sprinkles: For a touch of sparkle and extra fun!
Optional Add-Ins
- ½ cup white chocolate chips: Adds a creamy contrast to the colorful dough.
- ½ cup dried cranberries or blueberries: For a pop of color and chewy texture.
- Zest of 1 lemon or orange: Brightens up the flavor profile.
Pro Tip:
If you’re using natural food dyes, start with 1 tablespoon of powder and adjust as needed to achieve your desired color intensity. Remember, a little goes a long way!
With these ingredients ready, you’re all set to create cookies that are as beautiful as they are delicious. Let’s move on to the fun part—making the dough and bringing those colors to life!
How to Make Colorful Ingredients in Some Cookie Recipes

Ready to turn your cookie dough into a rainbow of flavors and colors? Follow this step-by-step guide to create vibrant, eye-catching cookies that are as fun to make as they are to eat. Let’s dive in!
Step 1: Prepare the Dough
- Cream the Butter and Sugar: In a large mixing bowl, beat the softened butter and granulated sugar together until light and fluffy. This creates the perfect base for your cookies.
- Add the Egg and Vanilla: Mix in the egg and vanilla extract until fully combined. If you’re using a flax egg, make sure it’s well-prepared and gelatinous before adding.
- Combine Dry Ingredients: In a separate bowl, whisk together the flour, baking powder, and salt. Gradually add this to the wet ingredients, mixing until a soft dough forms.
Step 2: Divide and Color the Dough
- Portion the Dough: Divide the dough into equal portions, depending on how many colors you’d like to use. For example, if you’re making four colors, split the dough into four balls.
- Add Natural Food Dyes: To each portion, add 1-2 tablespoons of your chosen colorful ingredients (e.g., beetroot powder for pink, matcha for green, turmeric for yellow). Mix thoroughly until the color is evenly distributed.
- Pro Tip: Start with 1 tablespoon of powder and add more as needed to achieve your desired vibrancy.
- Optional Add-Ins: If you’re using white chocolate chips, dried fruit, or citrus zest, fold them into the colored dough at this stage.
Step 3: Shape and Chill
- Create Colorful Patterns: For marbled cookies, gently twist or layer different colored doughs together. For solid colors, simply roll each portion into a log or ball.
- Chill the Dough: Wrap the dough in plastic wrap and refrigerate for at least 30 minutes. Chilling helps the dough firm up, making it easier to handle and preventing the cookies from spreading too much while baking.
Step 4: Bake to Perfection
- Preheat the Oven: Set your oven to 350°F (175°C) and line baking sheets with parchment paper.
- Shape the Cookies: Roll the dough into 1-inch balls or use cookie cutters for fun shapes. Place them on the baking sheet, leaving about 2 inches between each cookie.
- Bake: Bake for 10-12 minutes, or until the edges are lightly golden. The centers may look slightly soft, but they’ll firm up as they cool.
- Cool: Let the cookies cool on the baking sheet for 5 minutes, then transfer them to a wire rack to cool completely.
Step 5: Add Finishing Touches
- Sprinkles or Glitter: While the cookies are still slightly warm, sprinkle on edible glitter or colorful sprinkles for extra flair.
- Drizzle with Melted Chocolate: For a decadent touch, drizzle melted white or dark chocolate over the cooled cookies.
And there you have it—irresistibly delicious, colorful cookies that are sure to impress! Now, let’s explore some pro tips and variations to take your baking to the next level.
Pro Tips and Variations
Now that you’ve mastered the basics of making colorful, irresistible cookies, let’s take your baking game to the next level with some expert tips and creative variations. Whether you’re looking to save time, experiment with flavors, or cater to dietary needs, these ideas will help you customize your cookies like a pro!
Pro Tips for Perfect Cookies
- Chill the Dough: Don’t skip the chilling step! It prevents the cookies from spreading too much and helps the colors stay vibrant.
- Use Parchment Paper: This ensures your cookies bake evenly and don’t stick to the baking sheet.
- Test for Doneness: Cookies are ready when the edges are lightly golden but the centers are still soft. They’ll firm up as they cool.
- Layer Colors for Marbling: For a stunning marbled effect, gently twist or press together different colored doughs before shaping.
- Prevent Color Fading: Natural food dyes can fade slightly during baking. To keep colors bright, avoid overbaking and store cookies in a cool, dark place.
Flavor Variations
- Citrus Zest: Add the zest of a lemon, lime, or orange to the dough for a fresh, zesty twist that pairs beautifully with colorful cookies.
- Spiced Cookies: Mix in a pinch of cinnamon, nutmeg, or cardamom for a warm, aromatic flavor that complements the vibrant colors.
- Nutty Crunch: Fold in chopped nuts like almonds, pistachios, or pecans for added texture and richness.
Dietary Adaptations
- Gluten-Free: Swap all-purpose flour with a gluten-free blend or almond flour for a gluten-free version that’s just as delicious.
- Vegan: Use vegan butter and a flax egg (1 tbsp ground flaxseed + 3 tbsp water) to make these cookies plant-based.
- Sugar-Free: Replace granulated sugar with a sugar substitute like erythritol or stevia for a lower-calorie option.
Time-Saving Hacks
- Make-Ahead Dough: Prepare the dough in advance and store it in the fridge for up to 3 days or freeze for up to 3 months. Simply thaw and bake when needed!
- Batch Baking: Double the recipe and freeze half the dough for future use. It’s perfect for last-minute treats or unexpected guests.
Creative Decorating Ideas
- Edible Flowers: Press edible flowers like pansies or rose petals into the dough before baking for an elegant, natural touch.
- Dip in Chocolate: Dip half of each cooled cookie in melted chocolate and sprinkle with crushed nuts or coconut flakes for a decadent finish.
- Seasonal Themes: Use colors and shapes to match holidays or seasons—think pastels for Easter, red and green for Christmas, or spooky shapes for Halloween.
With these tips and variations, you can make colorful cookies that are not only visually stunning but also tailored to your taste and lifestyle. Ready to serve them up? Let’s move on to some delightful serving suggestions!
Serving Suggestions
Now that you’ve baked a batch of vibrant, irresistible cookies, it’s time to showcase them in a way that’s as delightful as the cookies themselves! Whether you’re serving them at a party, gifting them to a loved one, or enjoying them at home, these creative serving ideas will make your colorful cookies the star of the show.
Presentation Ideas
- Dessert Platter: Arrange your cookies on a large platter in a rainbow pattern or by color gradient for a stunning visual effect. Add fresh berries or edible flowers for an extra pop of color.
- Cookie Jar Display: Store your cookies in a clear glass jar or cookie jar to let their vibrant colors shine through. It’s a simple yet charming way to keep them fresh and accessible.
- Tiered Stand: For parties or special occasions, use a tiered dessert stand to display your cookies. Layer them by color or shape for an elegant, eye-catching presentation.
Pairing Recommendations
- Milk or Hot Chocolate: Serve your cookies with a cold glass of milk or a warm mug of hot chocolate for a classic, comforting combination.
- Coffee or Tea: Pair your cookies with a cup of coffee or tea for a cozy afternoon treat. Matcha tea pairs beautifully with green cookies, while chai tea complements spiced variations.
- Ice Cream Sandwiches: Take your cookies to the next level by sandwiching a scoop of vanilla, strawberry, or matcha ice cream between two cookies. It’s a fun and indulgent dessert!
Gift Packaging Ideas
- Cookie Boxes: Pack your cookies in colorful gift boxes or tins lined with parchment paper. Tie them with a ribbon and add a personalized tag for a thoughtful homemade gift.
- Cellophane Bags: Place a few cookies in clear cellophane bags, tie them with a ribbon, and attach a small note or recipe card. Perfect for party favors or holiday gifts.
- Mason Jars: Layer different colored cookies in a mason jar for a rustic, charming gift. Add a fabric lid cover or twine bow for a finishing touch.
Seasonal and Themed Serving Ideas
- Holiday Platters: Use cookie cutters to shape your dough into holiday-themed designs (e.g., stars, trees, or hearts) and arrange them on a platter with festive decorations.
- Kid’s Party Fun: Create a cookie decorating station with colorful icing, sprinkles, and edible glitter. Let kids decorate their own cookies for a fun, interactive activity.
- Brunch Addition: Add a plate of colorful cookies to your brunch spread alongside pastries, fruit, and coffee. They’re sure to brighten up the table!
Pro Tip:
If you’re serving cookies at an event, label any unique ingredients (e.g., nuts, gluten-free flour) to help guests with dietary restrictions enjoy them worry-free.
With these serving suggestions, your colorful cookies will not only taste amazing but also look like a work of art. Ready to wrap things up? Let’s head to the conclusion for some final thoughts and inspiration!
Conclusion
Congratulations—you’ve just created a batch of irresistibly delicious, colorful cookies that are as fun to make as they are to eat! Whether you’re baking for a special occasion, a family treat, or just to satisfy your sweet tooth, these vibrant cookies are sure to bring joy to anyone who tries them.
Why These Cookies Stand Out
- Visually Stunning: The use of natural, colorful ingredients makes these cookies a feast for the eyes, perfect for impressing guests or brightening up your day.
- Endlessly Customizable: From marbled designs to seasonal shapes, these cookies are a blank canvas for your creativity.
- Perfect for Everyone: With easy adaptations for dietary needs and kid-friendly fun, these cookies are a versatile treat for all ages and preferences.
A Final Word of Encouragement
Don’t be afraid to experiment! Baking is all about having fun and trying new things. Mix and match colors, flavors, and decorations to make these cookies uniquely yours. And remember, even if they don’t turn out exactly as planned, they’ll still taste amazing—because homemade cookies always do.
Share the Love
If you loved this recipe, why not share it with friends and family? Post a photo of your colorful creations on social media and tag your baking buddies. You might just inspire someone else to try their hand at vibrant, creative baking!
Thank you for joining me on this colorful baking adventure. I hope these cookies bring as much happiness to your kitchen as they do to mine. Now, go enjoy your delicious, vibrant treats—you’ve earned it!
____________________________
colorful ingredients in some cookie recipes
Ingredients
Dry Ingredients
- 2 ½ cups all-purpose flour: The base of your cookie dough. For a gluten-free option swap with almond flour or a gluten-free blend.
- 1 tsp baking powder: Helps your cookies rise slightly for that perfect texture.
- ½ tsp salt: Balances the sweetness and enhances the flavors.
Wet Ingredients
- 1 cup unsalted butter softened: Adds richness and helps create a tender crumb. Use vegan butter for a dairy-free version.
- 1 cup granulated sugar: For that classic sweetness. You can also use coconut sugar for a healthier twist.
- 1 large egg: Binds the dough together. Substitute with a flax egg 1 tbsp ground flaxseed + 3 tbsp water for a vegan option.
- 1 tsp vanilla extract: Adds a warm aromatic flavor.
Colorful Ingredients
- 1-2 tbsp beetroot powder: For a vibrant pink or red hue.
- 1-2 tbsp matcha powder: Adds a beautiful green color and a subtle earthy flavor.
- 1-2 tbsp turmeric powder: Perfect for sunny yellow cookies.
- 1-2 tbsp cocoa powder: For rich chocolatey brown tones.
- Freeze-dried fruit powders e.g., raspberry, blueberry: Natural, fruity, and packed with color.
- Edible glitter or sprinkles: For a touch of sparkle and extra fun!
Optional Add-Ins
- ½ cup white chocolate chips: Adds a creamy contrast to the colorful dough.
- ½ cup dried cranberries or blueberries: For a pop of color and chewy texture.
- Zest of 1 lemon or orange: Brightens up the flavor profile.
Instructions
Step 1: Prepare the Dough
- Cream the Butter and Sugar: In a large mixing bowl, beat the softened butter and granulated sugar together until light and fluffy. This creates the perfect base for your cookies.
- Add the Egg and Vanilla: Mix in the egg and vanilla extract until fully combined. If you’re using a flax egg, make sure it’s well-prepared and gelatinous before adding.
- Combine Dry Ingredients: In a separate bowl, whisk together the flour, baking powder, and salt. Gradually add this to the wet ingredients, mixing until a soft dough forms.
Step 2: Divide and Color the Dough
- Portion the Dough: Divide the dough into equal portions, depending on how many colors you’d like to use. For example, if you’re making four colors, split the dough into four balls.
- Add Natural Food Dyes: To each portion, add 1-2 tablespoons of your chosen colorful ingredients (e.g., beetroot powder for pink, matcha for green, turmeric for yellow). Mix thoroughly until the color is evenly distributed.
- Pro Tip: Start with 1 tablespoon of powder and add more as needed to achieve your desired vibrancy.
- Optional Add-Ins: If you’re using white chocolate chips, dried fruit, or citrus zest, fold them into the colored dough at this stage.
Step 3: Shape and Chill
- Create Colorful Patterns: For marbled cookies, gently twist or layer different colored doughs together. For solid colors, simply roll each portion into a log or ball.
- Chill the Dough: Wrap the dough in plastic wrap and refrigerate for at least 30 minutes. Chilling helps the dough firm up, making it easier to handle and preventing the cookies from spreading too much while baking.
Step 4: Bake to Perfection
- Preheat the Oven: Set your oven to 350°F (175°C) and line baking sheets with parchment paper.
- Shape the Cookies: Roll the dough into 1-inch balls or use cookie cutters for fun shapes. Place them on the baking sheet, leaving about 2 inches between each cookie.
- Bake: Bake for 10-12 minutes, or until the edges are lightly golden. The centers may look slightly soft, but they’ll firm up as they cool.
- Cool: Let the cookies cool on the baking sheet for 5 minutes, then transfer them to a wire rack to cool completely.
Step 5: Add Finishing Touches
- Sprinkles or Glitter: While the cookies are still slightly warm, sprinkle on edible glitter or colorful sprinkles for extra flair.
- Drizzle with Melted Chocolate: For a decadent touch, drizzle melted white or dark chocolate over the cooled cookies
Notes
| Nutrient | Amount |
|---|---|
| Calories | 120 kcal |
| Fat | 6g |
| Saturated Fat | 3.5g |
| Carbohydrates | 15g |
| Sugar | 8g |
| Protein | 2g |
| Sodium | 50mg |
| Fiber | 0.5g |
FAQs
Got questions about making colorful, irresistible cookies? Don’t worry—I’ve got you covered! Here are answers to some of the most common questions to help you bake with confidence and creativity.
1. Can I use artificial food coloring instead of natural ingredients?
Absolutely! While this recipe focuses on natural food dyes like beetroot powder and matcha, you can use liquid or gel food coloring if you prefer. Just add a few drops at a time until you achieve your desired color.
2. How do I prevent the colors from fading during baking?
Natural colors can fade slightly when exposed to heat. To keep them vibrant:
Avoid overbaking. Remove the cookies from the oven when the edges are just golden.
Store cookies in a cool, dark place to maintain their brightness.
3. Can I make the dough ahead of time?
Yes! The dough can be refrigerated for up to 3 days or frozen for up to 3 months. Just wrap it tightly in plastic wrap or place it in an airtight container. Thaw frozen dough in the fridge before baking.
4. How do I store these cookies to keep them fresh?
Store your cookies in an airtight container at room temperature for up to 5 days. For longer storage, freeze them in a single layer, then transfer to a freezer-safe bag for up to 2 months.
5. Can I make these cookies gluten-free or vegan?
For gluten-free cookies, swap the all-purpose flour with a gluten-free blend or almond flour.
For vegan cookies, use vegan butter and a flax egg (1 tbsp ground flaxseed + 3 tbsp water).
6. Why did my cookies spread too much?
Cookies can spread if the dough is too warm or if there’s too much butter. To fix this:
Chill the dough for at least 30 minutes before baking.
Ensure your butter is softened but not melted.
7. Can I use fresh fruits for coloring instead of powders?
Fresh fruits can add moisture, which might affect the dough’s texture. If you’d like to experiment, try reducing the liquid in the recipe or using freeze-dried fruit powders for a more concentrated color.
8. How can I make the colors more vibrant?
For deeper, more vibrant colors:
Use a bit more natural dye powder (start with 1-2 tablespoons).
Avoid overmixing the dough, as this can dilute the color.
9. What’s the best way to decorate these cookies?
Get creative! Use edible glitter, sprinkles, or a drizzle of melted chocolate. You can also dip half of each cookie in icing or dust them with powdered sugar for a festive touch.
10. Can I use this recipe for other types of baked goods?
Yes! This dough is versatile and can be adapted for colorful cupcakes, bars, or even thumbprint cookies. Just adjust the baking time as needed.