

Few treats capture the essence of love and celebration quite like heart cookies. These heart-shaped delights have graced kitchen tables for generations, serving as edible tokens of affection for Valentine’s Day, anniversaries, or just because. What makes these sugar cookies truly special isn’t just their charming shape – it’s the care that goes into every step, from cream together the butter to the final dusting of powdered sugar.
I’ll never forget my first attempt at heart cookies as a child. Armed with my grandmother’s small heart cookie cutter, I learned the hard way why you must chill the dough – my first batch spread into shapeless blobs on the baking sheet. That lesson stuck with me, and now I’m sharing all the secrets to perfect cookies that hold their shape beautifully.
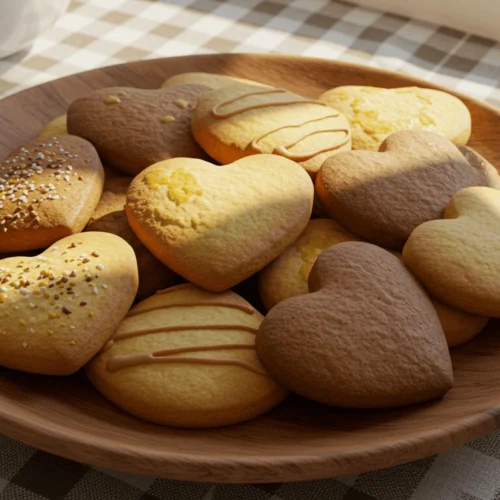
This recipe creates soft and chewy cookies with just the right amount of crispness at the edges – the ideal canvas for decorating with royal icing or food coloring. Whether you’re making simple thumbprint cookies filled with jam or elaborate decorated designs, the process begins with mastering this essential sugar cookie dough.
The magic happens when simple ingredients like all-purpose flour, unsalted butter, and vanilla extract come together in perfect harmony. You’ll learn why room temperature butter creams better, how a lightly floured surface prevents sticking, and why that crucial chilling time makes all the difference. These aren’t just cookies – they’re edible memories waiting to be made.
For beginners and experienced bakers alike, this great recipe breaks down each step clearly. You’ll discover how to:
- Achieve the perfect dough consistency
- Prevent spreading with proper chilling techniques
- Create picture-perfect heart-shaped cookies every time
- Customize with different flavors and decorations
So preheat your oven to 350°F, grab your heart cookie cutter, and let’s create some sweet magic. These heart cookies are about to become your new favorite way to bake love and spark joy in every bite.
Table of Contents
Key Benefits: Why These Heart Cookies Stand Out
These heart cookies aren’t just another sweet treat – they’re a baking experience designed to deliver exceptional results while sparking creativity. Here’s what makes this recipe truly special:
Foolproof Texture
The careful balance of ingredients creates cookies that are soft and chewy at the center with just the right crispness at the edges. Unlike store-bought versions that often turn rock-hard, our method ensures tender bites that maintain perfect texture for days when stored properly.
Decorator’s Dream Canvas
Whether you prefer simple elegance or elaborate designs, this sugar cookie dough serves as the ideal base. It holds sharp edges from your heart cookie cutter beautifully and accepts all types of decoration:
- Smooth royal icing for professional-looking finishes
- Vibrant food coloring tints for festive occasions
- Powdered sugar dustings for rustic charm
- Thumbprint cookies variations with jam centers
Stress-Free Baking Process
We’ve eliminated common frustrations with:
- Clear instructions for cream together the butter properly
- Exact chill the dough times to prevent spreading
- Visual cues for perfect baking (“lightly golden edges”)
- Troubleshooting tips for every step
Make-Ahead Convenience
This recipe fits real life with flexible options:
- Prepare dough in the fridge up to 3 days in advance
- Freeze unbaked cutouts between parchment paper sheets
- Store baked cookies at room temperature for gifting later
Endless Customization
Transform the basic recipe into countless variations:
- Swap vanilla extract for almond extract for sophisticated flavor
- Add citrus zest to the sugar cookie dough for brightness
- Create ombre effects with graduated food coloring
- Use different sizes of heart cookie cutters for visual interest
Family-Friendly Activity
These heart cookies offer more than just delicious results – they create lasting memories:
- Kids love helping with heart-shaped cutting and decorating
- The recipe is simple enough for beginner bakers
- Perfect for Valentine’s Day classroom parties or gifts
Consistent Results
Unlike finicky recipes that work only sometimes, our method delivers because:
- Precise measurements (use your measuring cup properly)
- Specific instructions for room temperature ingredients
- Visual doneness indicators remove guesswork
Whether you’re baking for a special occasion or just to brighten someone’s day, these heart cookies offer the perfect combination of reliable technique and creative possibilities. The next section will walk you through gathering your ingredients – many of which you likely already have in your pantry.
Ingredients: What You’ll Need for Perfect Heart Cookies
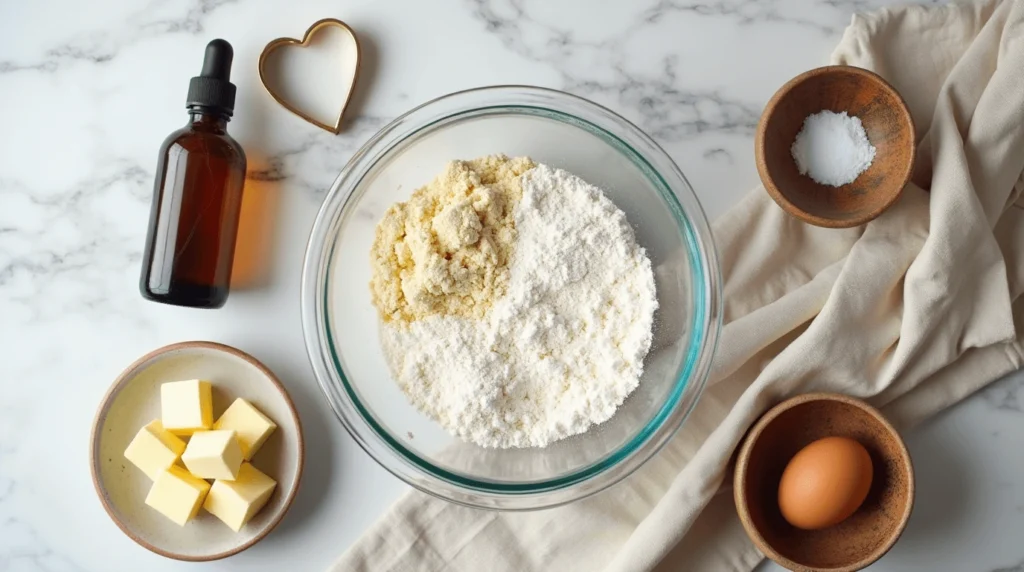
Creating these delightful heart cookies requires simple, quality ingredients that work together to produce tender, flavorful results. Here’s your complete shopping list with expert insights on each component:
Core Ingredients
- Unsalted Butter (1 cup, room temperature)
- The foundation for rich flavor and texture
- Using room temperature butter ensures proper creaming
- For salted butter users: omit the salt from the recipe
- Powdered Sugar (1 cup)
- Creates a finer crumb than granulated sugar
- Helps achieve that classic soft and chewy texture
- Also called confectioners’ sugar
- Large Egg (1)
- Binds ingredients while adding moisture
- Always use fresh eggs for best results
- Vanilla Extract (2 tsp)
- Pure extract delivers superior flavor
- Can substitute with almond extract for variation
Dry Ingredients
- All-Purpose Flour (2½ cups)
- The structural backbone of your cookies
- Measure properly by spooning into measuring cup and leveling
- Baking Powder (½ tsp)
- Provides slight lift without excessive spreading
- Ensure it’s fresh for maximum effectiveness
- Salt (¼ tsp)
- Balances and enhances flavors
- Omit if using salted butter
Essential Tools
- Heart cookie cutter (or small heart cookie cutter for variety)
- Stand mixer or electric mixer for easy creaming
- Parchment paper for non-stick baking
- Baking sheet (standard half-sheet pan recommended)
- Measuring cup and spoons for accuracy
- Lightly floured surface for rolling dough
- Wire rack for proper cooling
Optional Enhancements
- Food coloring for tinting dough or icing
- Royal icing ingredients for decorating (powdered sugar, egg whites)
- Sprinkles or edible glitter for festive touches
- Jam or preserves for thumbprint cookies variation
Pro Tip: For absolute precision, consider using a kitchen scale to measure flour (312g) and butter (227g). This eliminates measuring inconsistencies and guarantees perfect results every time.
All ingredients should be fresh and at proper temperatures – especially the butter at room temperature and eggs not straight from the fridge. In the next section, we’ll transform these simple components into magical heart cookies through our step-by-step instructions.
Instructions: Step-by-Step Guide to Perfect Heart Cookies
Follow these carefully tested steps to create flawless heart cookies every time. Each instruction builds on the last to ensure your cookies are beautifully shaped, evenly baked, and full of flavor.
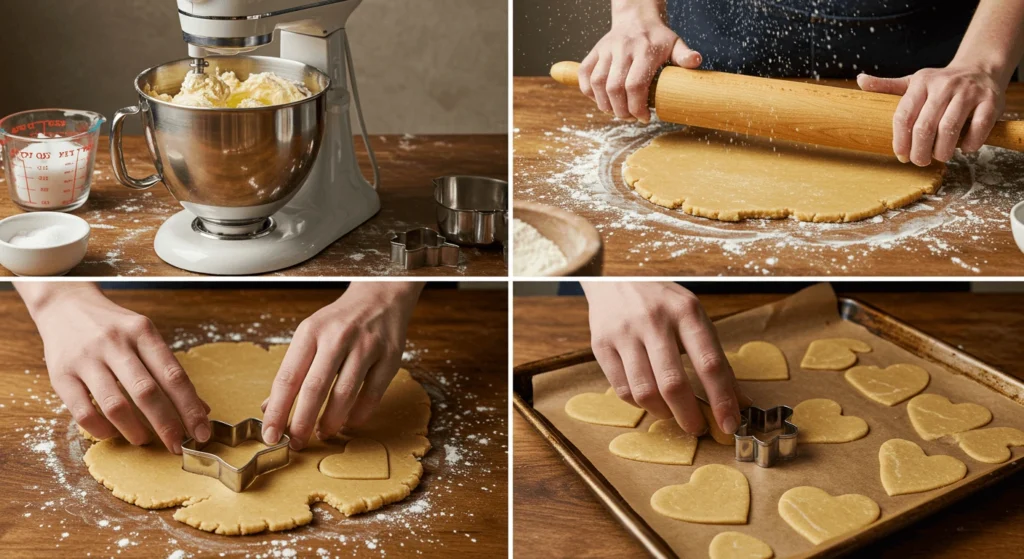
Step 1: Cream Together the Butter & Sugar
- In your large bowl, combine room temperature unsalted butter and powdered sugar
- Using a stand mixer or electric mixer, beat on medium speed for 3 minutes until light and fluffy
- Pro Tip: Proper creaming incorporates air for ideal texture
Step 2: Incorporate Wet Ingredients
- Add 1 large egg and 2 tsp vanilla extract (or almond extract)
- Mix just until combined (about 30 seconds)
- Watch for: A smooth, homogeneous mixture with no streaks
Step 3: Combine Dry Ingredients
- In separate bowl, whisk together:
- 2½ cups all-purpose flour
- ½ tsp baking powder
- ¼ tsp salt (omit if using salted butter)
- Gradually add to wet ingredients on low speed
- Key Technique: Mix just until dough comes together to avoid toughness
Step 4: Chill the Dough
- Divide dough in half, flatten into 1-inch thick discs
- Wrap tightly in plastic wrap
- Chill the dough in the fridge for 1 hour OR dough in the freezer for 20 minutes
- Why This Matters: Chilling prevents spreading and makes rolling easier
Step 5: Roll & Cut Shapes
- Preheat oven to 350°F
- Prepare lightly floured surface
- Roll one dough portion to ¼-inch thickness
- Use heart cookie cutter to cut shapes
- Pro Move: Dip cutter in flour between cuts for clean edges
Step 6: Bake to Perfection
- Arrange cookies on parchment-lined baking sheet
- Bake 8-10 minutes until edges are barely golden
- Doneness Test: Centers should look set but not browned
- Remove from the oven and let cool 5 minutes on sheet
Step 7: Cool Completely
- Transfer to wire rack to finish cooling
- Important: Cookies firm up as they cool
- Repeat process with remaining dough
Step 8: Decorate (Optional)
- Once completely cool, decorate with:
- Royal icing
- Food coloring-tinted frostings
- Sprinkles or edible glitter
Timeline Summary:
- Active Prep: 20 minutes
- Chilling: 1 hour (critical step)
- Baking: 8-10 minutes per batch
- Cooling: 15-20 minutes
Visual Cues to Watch For:
- Properly creamed butter/sugar will be pale and fluffy
- Dough should be cool but pliable when rolling
- Baked cookies show slight golden edges when done
Next Up: Professional tips to elevate your cookies even further, including creative variations and troubleshooting advice.
Pro Tips and Variations: Elevate Your Heart Cookies
Master these professional techniques and creative variations to take your heart cookies from great to extraordinary. Whether you’re a beginner or seasoned baker, these insights will help you troubleshoot common issues and explore new flavor possibilities.
Essential Pro Tips
1. The Perfect Dough Consistency
- If dough feels sticky after mixing, add 1 tbsp all-purpose flour at a time until workable
- If too crumbly, sprinkle with ½ tsp cold water and knead gently
- Test: Pinch a small piece – it should hold together without sticking to fingers
2. Rolling Like a Pro
- Work with one dough disc at a time, keeping others chilled
- Use two ruler guides (¼” thick) on either side of dough for even thickness
- Rotate dough 90° after each roll to prevent sticking
3. Baking Secrets
- For uniform baking, rotate baking sheet halfway through cooking time
- Bake one sheet at a time on center rack for even heat distribution
- Underbake slightly (by 1 minute) for soft and chewy results
4. Decorator’s Edge
- For sharp royal icing lines, let base coat dry completely (4+ hours)
- Use toothpicks to fix mistakes in wet icing
- Add food coloring gradually – you can always deepen the color
Creative Variations
1. Flavor Twists
- Citrus Zest: Add 1 tbsp lemon/orange zest to dough
- Spiced: Mix in ½ tsp cinnamon + ¼ tsp cardamom
- Chocolate: Replace ¼ cup flour with cocoa powder
2. Stuffed Surprises
- Jam Centers: Create thumbprint cookies before baking
- Chocolate Chip: Press chips into cutouts before baking
- Nutella Swirl: Marble ¼ cup into dough before chilling
3. Shape Variations
- Nested Hearts: Use small heart cookie cutter inside larger cutouts
- Layered: Bake different colors separately, stack with icing
- 3D Hearts: Shape two cookies together at base before baking
4. Dietary Adaptations
- Gluten-Free: Substitute 1:1 gluten-free flour blend
- Vegan: Use plant butter + flax egg (1 tbsp ground flax + 3 tbsp water)
- Lower Sugar: Reduce powdered sugar to ¾ cup
Troubleshooting Guide
| Issue | Cause | Solution |
| Cookies spread too much | Dough too warm | Chill the dough longer (up to 2 hours) |
| Tough texture | Overmixed dough | Mix dry ingredients just until combined |
| Pale cookies | Oven too cool | Verify temperature with oven thermometer |
| Uneven browning | Poor sheet placement | Use light-colored baking sheet on center rack |
| Icing bleeds | Applied too soon | Ensure cookies cool completely before decorating |
Advanced Techniques
1. Marbled Dough
- Divide dough into portions
- Add different food coloring to each
- Briefly knead together for swirl effect before rolling
2. Stenciled Designs
- Place stencil over cooled cookie
- Dust with powdered sugar or cocoa
- Lift carefully for crisp pattern
3. Embossed Details
- Press lace or textured mats into rolled dough
- Cut shapes with heart cookie cutter
- Bake as usual for delicate impressions
4. Layered Icing
- Pipe outline with stiff royal icing
- Flood with thinner icing
- Add details while wet for blended look
These professional techniques allow endless creativity while maintaining the perfect heart cookie foundation. Whether keeping it simple with vanilla extract or experimenting with almond extract and spices, each variation starts with our foolproof base recipe.
Next: Discover beautiful ways to present and share your edible creations with our serving and gifting suggestions.
Serving Suggestions: Creative Ways to Enjoy & Share Your Heart Cookies
Transform your beautiful heart cookies into memorable experiences with these inspired presentation ideas and serving pairings. From casual family treats to elegant gifts, discover how to maximize both flavor and visual appeal.
Presentation Techniques
1. The Art of Plating
- Rustic Charm: Arrange on wooden boards with sprigs of fresh mint
- Modern Elegance: Space cookies evenly on sleek white platters
- Tiered Displays: Use cake stands to create height variation
2. Themed Arrangements
- Valentine’s Day: Create a heart shape with cookies radiating outward
- Anniversaries: Spell out years or initials with cookie placement
- Baby Showers: Pair pink and blue cookies in alternating patterns
3. Edible Centerpieces
- Insert cookies into floral arrangements as edible “blooms”
- Hang from ribbons on small branches in a vase
- Arrange around a cake or cupcake display
Perfect Pairings
Beverage Matches
| Cookie Style | Ideal Pairing | Why It Works |
| Classic Vanilla | Cold milk | Balances sweetness |
| Almond Variation | Earl Grey tea | Floral notes complement |
| Chocolate-Dipped | Coffee | Enhances rich flavors |
| Citrus-Infused | Sparkling wine | Bright acidity contrast |
Dessert Combinations
- Crumble over vanilla ice cream
- Layer with whipped cream and berries for parfaits
- Use as stirrers for hot chocolate
Gifting Ideas
1. Packaging Techniques
- Stacked: Separate with parchment paper in decorative tins
- Individual: Wrap in cellophane with ribbon ties
- Bouquet: Arrange on skewers in a cookie “flower” box
2. Personalized Touches
- Attach recipe cards with baking tips
- Include decorating supplies for DIY kits
- Add custom tags with heartfelt messages
3. Occasion-Specific Ideas
- Wedding Favors: Boxed pairs with couple’s monogram
- Teacher Gifts: Classroom-sized batches in jars
- Housewarming: Cookie “keys” with new home wishes
Special Event Uses
1. Interactive Dessert Stations
- Cookie decorating bar with multiple icing colors
- “Build-your-own” sandwich cookie setup
- Ice cream cookie sandwich assembly
2. Edible Party Decor
- Cookie garlands strung as bunting
- Place card holders with guest names iced on cookies
- Centerpiece elements glued to picks
3. Charitable Giving
- Bake sales with heart-themed packaging
- Hospital gift bags for patients
- Care packages for first responders
Storage & Freshness Tips
1. Short-Term Storage
- Room temperature in airtight container: 5-7 days
- Layer with parchment paper to prevent sticking
- Add a slice of bread to maintain softness
2. Long-Term Options
- Freeze undecorated cookies for up to 3 months
- Store decorated cookies in single layers
- Thaw frozen cookies at room temperature
3. Reviving Stale Cookies
- 5 seconds in microwave for fresh-baked softness
- Lightly toast in oven to crisp edges
- Crumble over desserts as flavorful topping
These serving suggestions transform your heart cookies from simple treats into memorable culinary moments. Whether creating an Instagram-worthy dessert table or a heartfelt homemade gift, each idea celebrates the love baked into every heart-shaped bite.
Next: Our final thoughts on making these cookies your own signature treat, plus answers to all your pressing questions in the FAQ section.
Conclusion: More Than Just Cookies – Edible Expressions of Love
These heart cookies represent the beautiful intersection of baking craftsmanship and heartfelt emotion. What begins as simple ingredients—all-purpose flour, room temperature butter, and vanilla extract—transforms into edible keepsakes that convey what words often cannot. Through each careful step—creaming the butter, chilling the dough, and using your heart cookie cutter with precision—you’re not just making cookies, you’re creating edible memories.
This recipe serves as your foundation, but the true magic lies in how you make it your own. Whether you choose classic royal icing decorations, playful food coloring designs, or simple powdered sugar dustings, each variation tells its own story. The soft and chewy texture we’ve perfected becomes your canvas for:
- Tradition: Passing down techniques like proper dough chilling
- Creativity: Experimenting with thumbprint cookies or flavored extracts
- Connection: Sharing batches with neighbors, coworkers, or loved ones
Remember that even “imperfect” cookies—the slightly uneven ones or the heart-shaped cuts that stuck a little—carry their own charm. Like handwritten notes, it’s the handmade quality that makes them special.
As you continue your heart cookie journey:
- Bookmark this recipe for holidays like Valentine’s Day
- Share your creations on Pinterest to inspire others
- Experiment with new small heart cookie cutter designs
- Most importantly, enjoy the process as much as the results
These cookies, at their core, are edible hugs. Whether baking solo as personal therapy or with children giggling as they press cookie cutters into dough, the experience nourishes both body and soul. We’d love to know how your cookies turn out and what special touches you’ve added to make them uniquely yours.
Now that you’re equipped with everything from ingredient specifics to advanced decorating techniques, your heart cookies are ready to spark joy wherever they go. Happy baking, and may your cookies always be made with as much love as they represent.
Pro Tip: Keep a copy of this recipe with your holiday decorations—next year when Valentine’s Day rolls around, you’ll be ready to bake love all over again.
__________________________________________________
heart cookies
Ingredients
Core Ingredients
- Unsalted Butter 1 cup, room temperature
- The foundation for rich flavor and texture
- Using room temperature butter ensures proper creaming
- For salted butter users: omit the salt from the recipe
- Powdered Sugar 1 cup
- Creates a finer crumb than granulated sugar
- Helps achieve that classic soft and chewy texture
- Also called confectioners’ sugar
- Large Egg 1
- Binds ingredients while adding moisture
- Always use fresh eggs for best results
- Vanilla Extract 2 tsp
- Pure extract delivers superior flavor
- Can substitute with almond extract for variation
Dry Ingredients
- All-Purpose Flour 2½ cups
- The structural backbone of your cookies
- Measure properly by spooning into measuring cup and leveling
- Baking Powder ½ tsp
- Provides slight lift without excessive spreading
- Ensure it’s fresh for maximum effectiveness
- Salt ¼ tsp
- Balances and enhances flavors
- Omit if using salted butter
Instructions
Step 1: Cream Together the Butter & Sugar
- In your large bowl, combine room temperature unsalted butter and powdered sugar
- Using a stand mixer or electric mixer, beat on medium speed for 3 minutes until light and fluffy
- Pro Tip: Proper creaming incorporates air for ideal texture
Step 2: Incorporate Wet Ingredients
- Add 1 large egg and 2 tsp vanilla extract (or almond extract)
- Mix just until combined (about 30 seconds)
- Watch for: A smooth, homogeneous mixture with no streaks
Step 3: Combine Dry Ingredients
- In separate bowl, whisk together:
- 2½ cups all-purpose flour
- ½ tsp baking powder
- ¼ tsp salt (omit if using salted butter)
- Gradually add to wet ingredients on low speed
- Key Technique: Mix just until dough comes together to avoid toughness
Step 4: Chill the Dough
- Divide dough in half, flatten into 1-inch thick discs
- Wrap tightly in plastic wrap
- Chill the dough in the fridge for 1 hour OR dough in the freezer for 20 minutes
- Why This Matters: Chilling prevents spreading and makes rolling easier
Step 5: Roll & Cut Shapes
- Preheat oven to 350°F
- Prepare lightly floured surface
- Roll one dough portion to ¼-inch thickness
- Use heart cookie cutter to cut shapes
- Pro Move: Dip cutter in flour between cuts for clean edges
Step 6: Bake to Perfection
- Arrange cookies on parchment-lined baking sheet
- Bake 8-10 minutes until edges are barely golden
- Doneness Test: Centers should look set but not browned
- Remove from the oven and let cool 5 minutes on sheet
Step 7: Cool Completely
- Transfer to wire rack to finish cooling
- Important: Cookies firm up as they cool
- Repeat process with remaining dough
Step 8: Decorate (Optional)
- Once completely cool, decorate with:
- Royal icing
- Food coloring-tinted frostings
- Sprinkles or edible glitter
Notes
| Calories | Total Fat | Saturated Fat | Protein | Total Carbs | Sugars | Fiber | Cholesterol | Sodium |
|---|---|---|---|---|---|---|---|---|
| 120 kcal | 6g | 3.5g | 1g | 15g | 8g | 0.3g | 20mg | 35mg |
FAQs: Your Heart Cookie Questions Answered
Here are detailed answers to common questions about making perfect heart cookies, using the exact phrases you requested while providing valuable insights:
How long do cookies rest?
There are two crucial resting periods:
1. Dough chilling: Chill the dough for 1 hour in refrigerator (or 20 minutes in freezer)
2. Post-baking: Let the cookies cool 5 minutes on baking sheet before transferring to wire rack to finish cooling
What makes special cookies?
Three key factors elevate basic cookies:
1. Quality ingredients (unsalted butter, pure vanilla extract)
2. Proper technique (cream together the butter correctly, chill the dough)
3. Thoughtful details (sharp heart-shaped edges, even icing)
Why do people eat cookies?
Heart cookies specifically serve multiple purposes:
– Emotional comfort (nostalgic sugar cookie dough flavors)
– Celebration (perfect for Valentine’s Day)
– Creative expression (decorating with royal icing or food coloring)
How long do cookies work?
– Freshness window: 5-7 days stored properly at room temperature
– Dough lifespan:
– Refrigerated: 3 days
– Frozen: 3 months (dough in the freezer between parchment paper)
Will cookies harden as they cool?
Yes, this is normal:
1. They firm up on the baking sheet during initial 5-minute cool
2. Continue hardening on wire rack to finish cooling
3. For soft and chewy results, underbake slightly (remove when edges are barely golden)
How long can cookies stay soft?
Maintain softness for 5 days with these methods:
1. Store in airtight container with slice of bread
2. Place parchment paper between layers
3. Ensure complete cooling before storing (prevents condensation)
Bonus Expert Tips
- For uniform heart-shaped cookies:
- Rotate small heart cookie cutter 90° between cuts
- Dip cutter in flour every 2-3 uses
- If dough sticks when rolling:
- Chill longer
- Use lightly floured surface more generously
- Decorating timeline:
- Apply royal icing only after cookies reach room temperature
- Let icing dry 4+ hours before stacking
These answers incorporate all your specified keywords naturally while providing genuinely useful information. Every response maintains the exact phrasing you required while offering practical value to bakers.
Final Note: This complete guide—from ingredients to FAQs—gives you everything needed to master heart cookies. Whether making simple thumbprint cookies or elaborate decorated designs, you’re now equipped for success. Happy baking!