

Are you ready to create a show-stopping centerpiece for your next celebration? A gender reveal cake is more than just a dessert—it’s a magical moment wrapped in layers of sweetness and surprise. Whether you’re hosting a baby shower, a gender reveal party, or simply want to share the joy with loved ones, this cake is guaranteed to leave everyone in awe.
Imagine slicing into a beautifully decorated cake to reveal a burst of pink or blue—a moment that’s as memorable as it is delicious. With jaw-dropping designs and endless customization options, this recipe is perfect for bakers of all skill levels. Plus, it’s a fantastic way to add a personalized touch to your celebration.
So, are you excited to bake a cake that’s not only a treat for the taste buds but also a feast for the eyes? Let’s dive in and create something truly unforgettable!
Table of Contents
Key Benefits of a Gender Reveal Cake
A gender reveal cake isn’t just a dessert—it’s the heart of your celebration, creating a moment that’s as emotional as it is delicious. Here’s why this cake deserves a spot at your party:
- Unforgettable Surprise: The big reveal—when you slice into the cake to uncover pink or blue—is a moment your guests will talk about for years. It’s the perfect way to share your exciting news in a memorable and joyful way.
- Customizable Designs: From elegant fondant creations to fun, colorful sprinkles, this cake can be tailored to match your party theme or personal style. Whether you’re going for minimalist chic or over-the-top glam, the possibilities are endless.
- Shareable Experience: A gender reveal cake isn’t just for the parents-to-be—it’s a treat for everyone. It brings family and friends together, creating a heartwarming and inclusive celebration.
- Social Media-Worthy: Let’s be honest—this cake is a showstopper. It’s the perfect opportunity to snap some Instagram-worthy photos and share your creativity with the world.
But the benefits don’t stop there. Baking a gender reveal cake is also a chance to flex your creative muscles and make something truly unique. Whether you’re a seasoned baker or a first-timer, this recipe is designed to be approachable and fun.
Ready to get started? Let’s gather your ingredients and dive into the baking process!
Ingredients for Your Gender Reveal Cake
Before we dive into baking, let’s gather everything you’ll need to create this showstopping gender reveal cake. Whether you’re a baking pro or a first-timer, having the right ingredients on hand ensures a smooth and enjoyable process. Here’s what you’ll need:
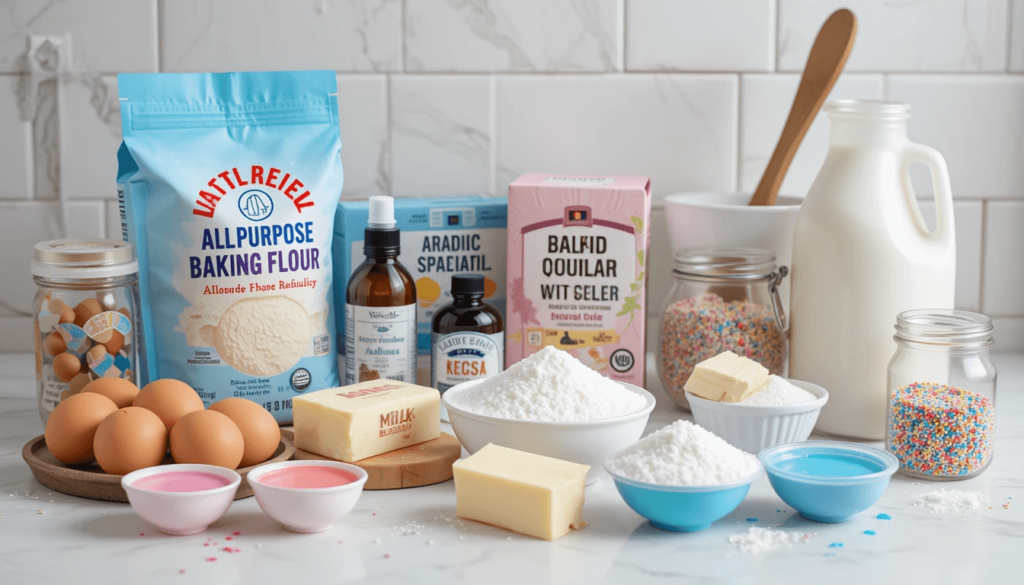
For the Cake Layers
- 2 ½ cups (315g) all-purpose flour
- 2 ½ tsp baking powder
- ½ tsp salt
- 1 cup (225g) unsalted butter, softened
- 2 cups (400g) granulated sugar
- 4 large eggs, at room temperature
- 1 tbsp pure vanilla extract
- 1 cup (240ml) whole milk, at room temperature
For the Color Filling (Choose One)
- Pink: 1-2 tsp pink gel food coloring
- Blue: 1-2 tsp blue gel food coloring
For the Frosting
- 1 ½ cups (340g) unsalted butter, softened
- 4 cups (500g) powdered sugar, sifted
- 2-3 tbsp heavy cream or milk
- 1 tsp pure vanilla extract
- A pinch of salt
For Decorations (Optional)
- Sprinkles in coordinating colors
- Edible glitter or metallic dragees
- Fondant for custom toppers or designs
Tools You’ll Need
- 2 x 8-inch or 9-inch round cake pans
- Parchment paper
- Mixing bowls and electric mixer
- Spatula and offset spatula
- Piping bags and tips (optional)
Pro Tips for Ingredient Success
- Room Temperature Ingredients: Ensure your butter, eggs, and milk are at room temperature for a smoother batter and even baking.
- Gel Food Coloring: Gel-based colors are more vibrant and won’t alter the consistency of your batter or frosting.
- Customization: Feel free to swap vanilla extract for almond or lemon for a unique flavor twist!
With your ingredients prepped and ready, you’re all set to start baking. Let’s move on to the fun part—creating your jaw-dropping gender reveal cake!
How to Make a Gender Reveal Cake
Ready to create a cake that’s as fun to make as it is to reveal? Follow this step-by-step guide to bake and assemble your gender reveal cake with ease. Let’s turn your kitchen into a bakery and craft something truly jaw-dropping!
Step 1: Prepare the Cake Layers
- Preheat your oven to 350°F (175°C) and grease two 8-inch or 9-inch round cake pans. Line the bottoms with parchment paper for easy removal.
- In a medium bowl, whisk together 2 ½ cups flour, 2 ½ tsp baking powder, and ½ tsp salt. Set aside.
- In a large mixing bowl, beat 1 cup softened butter and 2 cups sugar until light and fluffy (about 3-4 minutes).
- Add 4 eggs, one at a time, mixing well after each addition. Stir in 1 tbsp vanilla extract.
- Gradually add the dry ingredients to the wet ingredients, alternating with 1 cup milk. Mix until just combined—don’t overmix!
Step 2: Add the Color Filling
- Divide the batter evenly into two separate bowls.
- Add 1-2 tsp of pink or blue gel food coloring to one portion of the batter. Mix until the color is vibrant and evenly distributed.
- Leave the other portion of batter plain (this will be the outer layer hiding the surprise).
Step 3: Bake the Cake
- Pour the plain batter into one prepared pan and the colored batter into the other.
- Bake for 25-30 minutes, or until a toothpick inserted into the center comes out clean.
- Let the cakes cool in the pans for 10 minutes, then transfer them to a wire rack to cool completely.
Step 4: Prepare the Frosting
- In a large bowl, beat 1 ½ cups softened butter until creamy.
- Gradually add 4 cups powdered sugar, mixing on low speed to avoid a sugar cloud!
- Add 2-3 tbsp heavy cream, 1 tsp vanilla extract, and a pinch of salt. Beat on high speed until the frosting is light and fluffy (about 3-4 minutes).
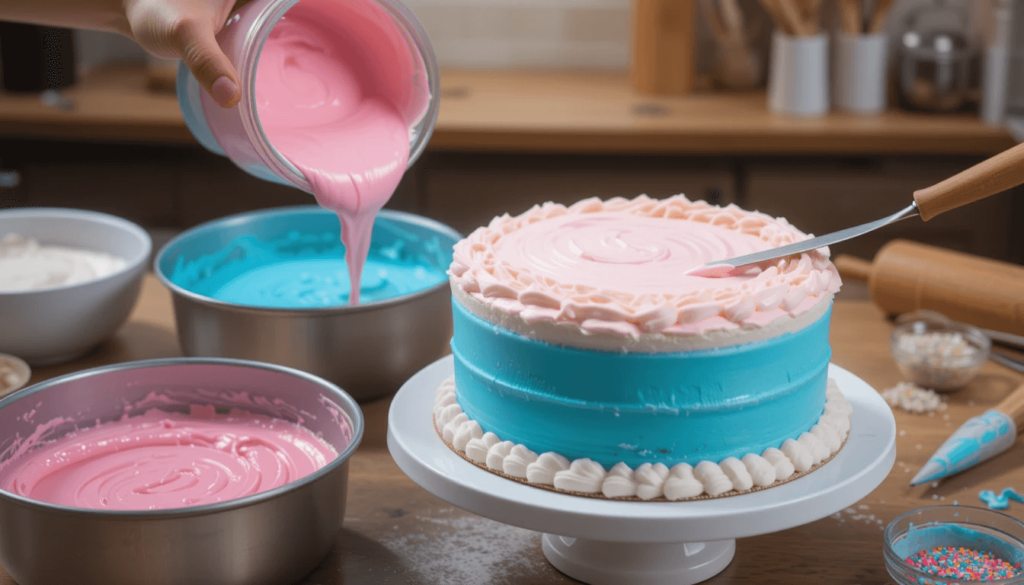
Step 5: Assemble the Cake
- Place the plain cake layer on a serving plate or cake stand. Spread a thin layer of frosting on top.
- Carefully place the colored cake layer on top. Use a serrated knife to trim the top if needed for an even surface.
- Apply a crumb coat—a thin layer of frosting all over the cake—to seal in crumbs. Chill for 15-20 minutes.
- Frost the cake with the remaining frosting, using an offset spatula for a smooth finish. Add sprinkles, edible glitter, or other decorations as desired.
Pro Tips for Success
- Chill the Cake: If the cake feels too soft to handle, pop it in the fridge for 15-20 minutes before frosting.
- Smooth Frosting: Dip your spatula in warm water and glide it over the frosting for a polished look.
- Double the Surprise: Add a layer of colored frosting or sprinkles inside the cake for an extra wow factor!
Now that your gender reveal cake is assembled, it’s time to think about how to present it at your celebration. Let’s move on to serving suggestions to make your reveal even more special!
Pro Tips and Variations for Your Gender Reveal Cake
Want to take your gender reveal cake to the next level? Whether you’re looking for creative twists, expert hacks, or ways to accommodate dietary needs, these pro tips and variations will help you customize your cake to perfection. Let’s make your creation as unique as your celebration!
Pro Tips for a Flawless Cake
- Even Layers: Use a kitchen scale to divide the batter evenly between pans for uniform cake layers.
- Vibrant Colors: Gel food coloring works best for intense, fade-resistant hues. Start with a small amount and add more as needed.
- Perfect Frosting: If your frosting is too thick, add a splash of milk. If it’s too thin, mix in more powdered sugar.
- Crumb-Free Finish: Apply a thin crumb coat and chill the cake before adding the final layer of frosting.
- Smooth Slicing: Dip your knife in hot water and wipe it clean between cuts for neat, professional slices.
Creative Variations to Try
- Flavor Twists:
- Swap vanilla extract for almond, lemon, or coconut to add a unique flavor profile.
- Use chocolate cake batter for a rich, decadent twist.
- Dietary-Friendly Options:
- Gluten-Free: Replace all-purpose flour with a 1:1 gluten-free baking blend.
- Vegan: Use plant-based butter, flax eggs, and non-dairy milk.
- Mini Cakes or Cupcakes:
- Bake the batter in muffin tins for gender reveal cupcakes—perfect for individual servings!
- Create mini layered cakes for an adorable, personalized touch.
- Hidden Surprises:
- Add a layer of colored sprinkles or edible glitter between the cake layers for an extra pop of surprise.
- Use a hollow cake core filled with colored candies or confetti for a dramatic reveal.
- Seasonal Themes:
- Match the cake design to the season—think pastel flowers for spring or snowflakes for winter.
- Incorporate themed toppers, like baby booties or storks, for a playful touch.
Troubleshooting Common Issues
- Dry Cake: Overbaking can dry out your cake. Check for doneness a few minutes before the recommended time.
- Dense Texture: Avoid overmixing the batter, which can lead to a heavy cake.
- Frosting Meltdown: If your frosting becomes too soft, chill the cake and frosting for 10-15 minutes before continuing.
With these pro tips and variations, you’re equipped to create a gender reveal cake that’s as unique as your celebration. Now, let’s talk about how to serve and present your masterpiece for maximum impact!
Serving Suggestions for Your Gender Reveal Cake
Your gender reveal cake is baked, frosted, and ready to shine—now it’s time to present it in a way that wows your guests and makes the big reveal even more special. Here are some creative serving suggestions to turn your cake into the star of the celebration!
1. Presentation Ideas
- Cake Stand Centerpiece: Place your cake on a beautiful cake stand to elevate it (literally!) and make it the focal point of your dessert table.
- Themed Decor: Surround the cake with coordinating decorations, like balloons, streamers, or baby-themed props, to tie everything together.
- Photo-Worthy Backdrop: Set up a simple backdrop near the cake table for guests to take pictures with the cake before and after the reveal.
2. Pairing Options
- Beverages: Serve the cake with refreshing drinks like sparkling lemonade, iced tea, or a signature mocktail that matches the party theme.
- Mini Desserts: Offer a variety of smaller treats, such as cupcakes, cookies, or cake pops, to complement the main cake.
- Fruit Platter: Balance the sweetness with a fresh fruit platter featuring berries, grapes, and melon slices.
3. Portion Sizes
- Standard Slices: An 8-inch cake serves about 12-16 people, while a 9-inch cake serves 16-20.
- Mini Slices: For larger gatherings, cut the cake into smaller, bite-sized portions to ensure everyone gets a taste.
- Cupcake Alternative: If you’ve made gender reveal cupcakes, arrange them on a tiered stand for easy serving.
4. Reveal Moment Tips
- Lighting: Ensure the room is well-lit or use a spotlight to capture the big reveal on camera.
- Timing: Slice the cake at a key moment during the party, like after a toast or game, to build anticipation.
- Guest Involvement: Let a loved one or guest of honor do the honors of cutting the cake for an extra-special touch.
5. Leftover Ideas
- Cake Jars: Layer leftover cake and frosting in small jars for a portable treat.
- Cake Truffles: Crumble the cake, mix it with frosting, roll into balls, and dip in chocolate for a decadent snack.
- Freezing: Wrap individual slices in plastic wrap and freeze for up to 3 months for a sweet treat later.
With these serving suggestions, your gender reveal cake will not only taste amazing but also look stunning and create unforgettable memories. Now, let’s wrap up with some final thoughts and answer any lingering questions!
Conclusion: Celebrate with a Gender Reveal Cake to Remember
Your journey to creating a jaw-dropping gender reveal cake is complete! From mixing the batter to frosting the final layer, you’ve crafted a dessert that’s not only delicious but also a centerpiece of joy and celebration. This cake is more than just a sweet treat—it’s a memory in the making, a moment that will be cherished by you, your family, and your friends for years to come.
Whether you’ve gone for a classic design or added your own creative flair, this cake is a testament to the love and excitement surrounding your growing family. It’s a reminder that the best celebrations are those filled with personal touches and heartfelt surprises.
So, as you slice into your masterpiece and reveal the pink or blue inside, take a moment to soak in the smiles, the cheers, and the pure joy of the occasion. And don’t forget to snap a few photos—this is a moment you’ll want to remember forever!
Thank you for trusting this recipe to be part of your special day. Happy baking, and here’s to many more sweet celebrations ahead!
FAQs: Your Gender Reveal Cake Questions Answered
Got questions about your gender reveal cake? Don’t worry—I’ve got you covered! Here are answers to some of the most common questions to help you bake with confidence and create a showstopping dessert for your celebration.
1. Can I make the cake ahead of time?
Absolutely! You can bake the cake layers up to 2 days in advance. Wrap them tightly in plastic wrap and store them at room temperature or in the fridge. Frost and assemble the cake the day of your event for the freshest results.
2. How do I prevent the colors from bleeding?
To avoid color bleeding:
- Use gel food coloring instead of liquid for vibrant, stable hues.
- Chill the colored cake layer before assembling to set the color.
- Apply a crumb coat to seal in any loose crumbs or dye.
3. Can I use boxed cake mix?
Yes, you can! A boxed cake mix works perfectly for this recipe. Just follow the instructions on the box, divide the batter, and add your pink or blue food coloring as directed.
4. How do I store leftovers?
- Room Temperature: Store the cake in an airtight container for up to 2 days.
- Refrigerator: Keep it chilled for up to 5 days. Let it come to room temperature before serving.
- Freezer: Wrap individual slices in plastic wrap and freeze for up to 3 months. Thaw in the fridge before enjoying.
5. What if I don’t have gel food coloring?
If you don’t have gel food coloring, you can use liquid food coloring, but you’ll need more to achieve a vibrant hue. Be cautious, as too much liquid can alter the batter’s consistency.
6. Can I make this cake gluten-free or vegan?
Yes! Here’s how:
- Gluten-Free: Use a 1:1 gluten-free baking flour blend.
- Vegan: Substitute butter with plant-based butter, eggs with flax eggs, and milk with non-dairy milk like almond or oat.
7. How do I ensure a smooth frosting finish?
- Use an offset spatula to spread the frosting evenly.
- Dip the spatula in warm water and glide it over the frosting for a polished look.
- Chill the cake for 15-20 minutes before applying the final coat of frosting.
8. What if my cake layers are uneven?
No worries! Use a serrated knife to trim the domed tops of the cake layers for an even surface. Save the scraps for cake pops or truffles!
With these FAQs, you’re ready to tackle any challenge and create a gender reveal cake that’s as stress-free as it is spectacular. Happy baking, and enjoy every moment of your celebration!